Each workspace is its own space for videos, folders, playlists, branding and collaboration, so an agency running five clients, or a business splitting brands and teams, can manage them all in one account without buying a separate Skippz plan for each, and without needing an enterprise tier.
This article covers managing workspaces themselves. For inviting people and setting their access, see the Team and collaboration collection.
This is the key thing to understand about workspaces.
Separate to each workspace is its content and presentation: its videos, folders and playlists, and its own branding, custom domain and share pages. Switching workspaces gives you a clean, self contained space.
Shared across your whole account is everything to do with your subscription and people: your plan and usage, billing, AI credits, team and profile. Your Dashboard shows account-wide totals across all workspaces.
It works this way on purpose. You can keep an eye on usage, billing and your team at the account level without hopping between workspaces to piece the picture together. Switch workspaces when you want to work on different content, and your account-level view stays unified throughout.
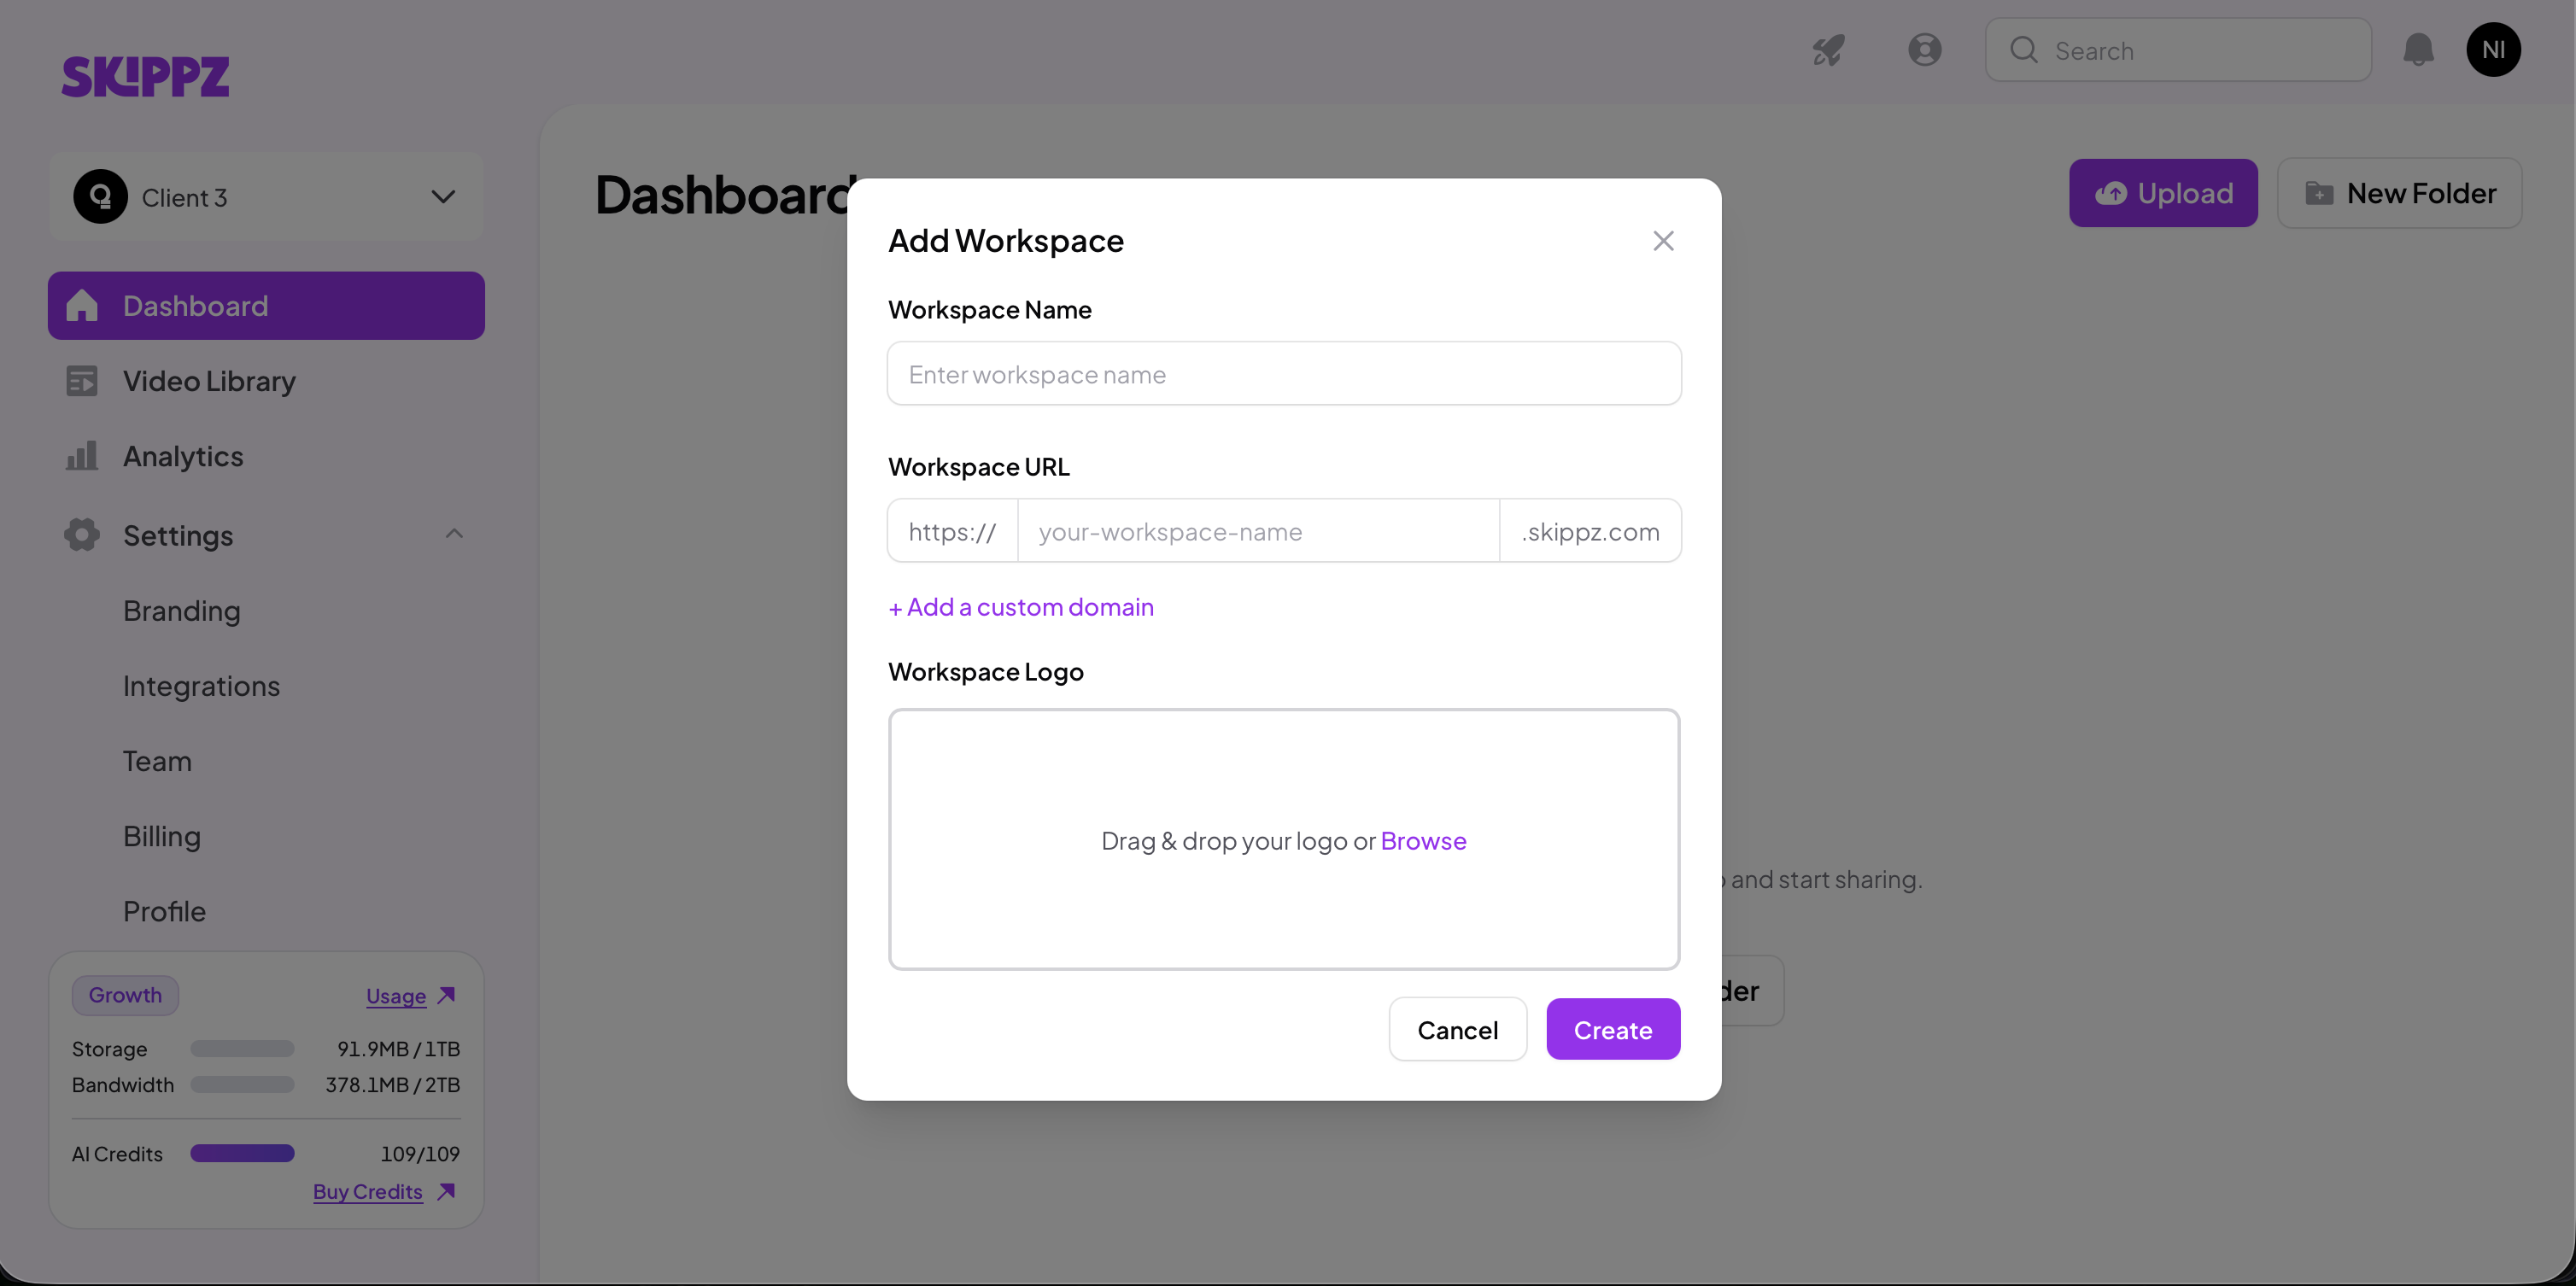
Multiple workspaces are available from the Pro plan and up. Open the workspace switcher at the top left of the sidebar and click Add Workspace. A workspace has:
A name, to identify it at a glance.
A Skippz subdomain, like yourname.skippz.com.
A logo, optional, shown in the switcher.
A custom domain, optional, which you can add now or later.
Pick the Skippz subdomain deliberately, because it cannot be changed once the workspace is created. A custom domain, by contrast, can be changed later.
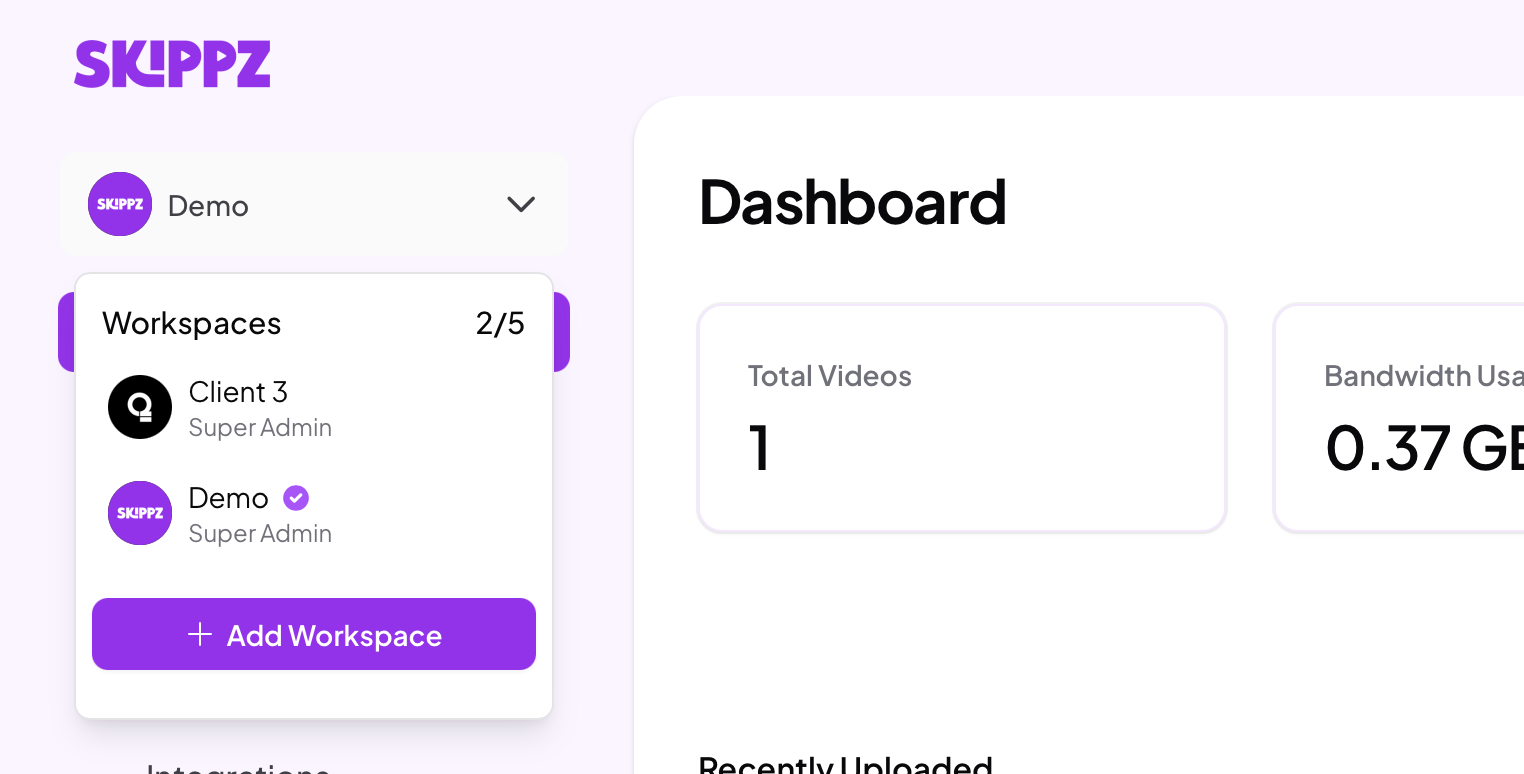
The switcher shows how many workspaces your plan allows, for example 2/5.
Click the switcher dropdown and choose a workspace. The purple tick marks the one you are currently in.
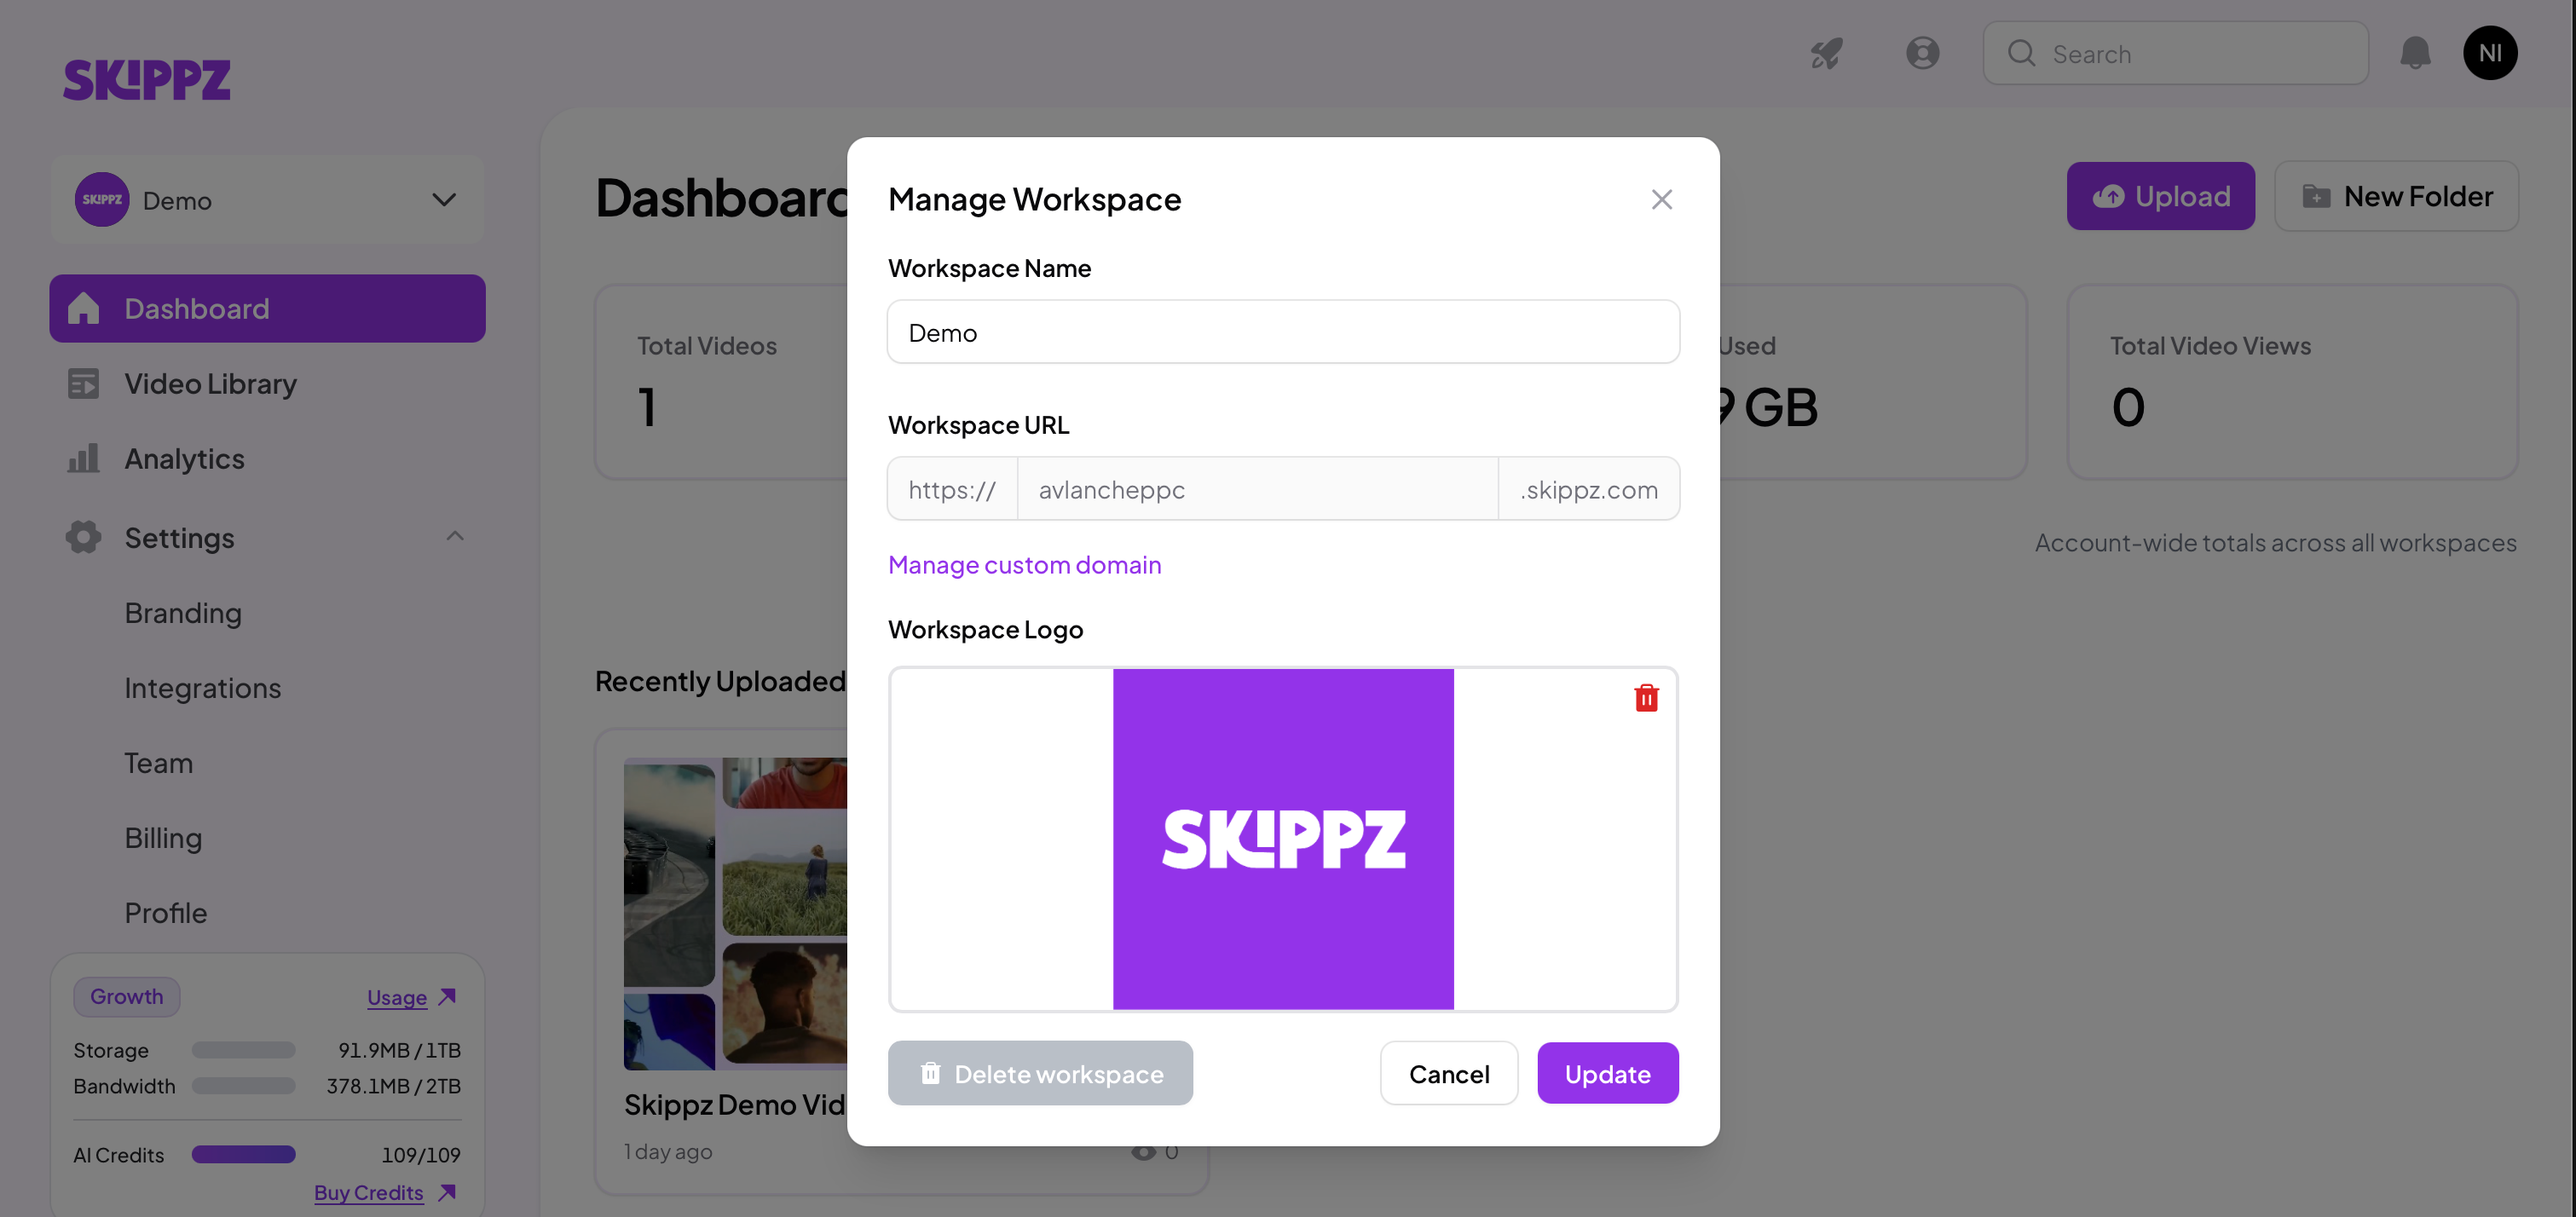
In the switcher, click the gear on a workspace to open Manage Workspace, where you can edit its name and logo, add a custom domain, then Update.
To delete a workspace, you must not be inside it. Switch to a different workspace first, then open Manage Workspace on the one you want to remove and click Delete workspace. Deleting a workspace permanently deletes every video inside it and cannot be undone, so move anything you want to keep beforehand.
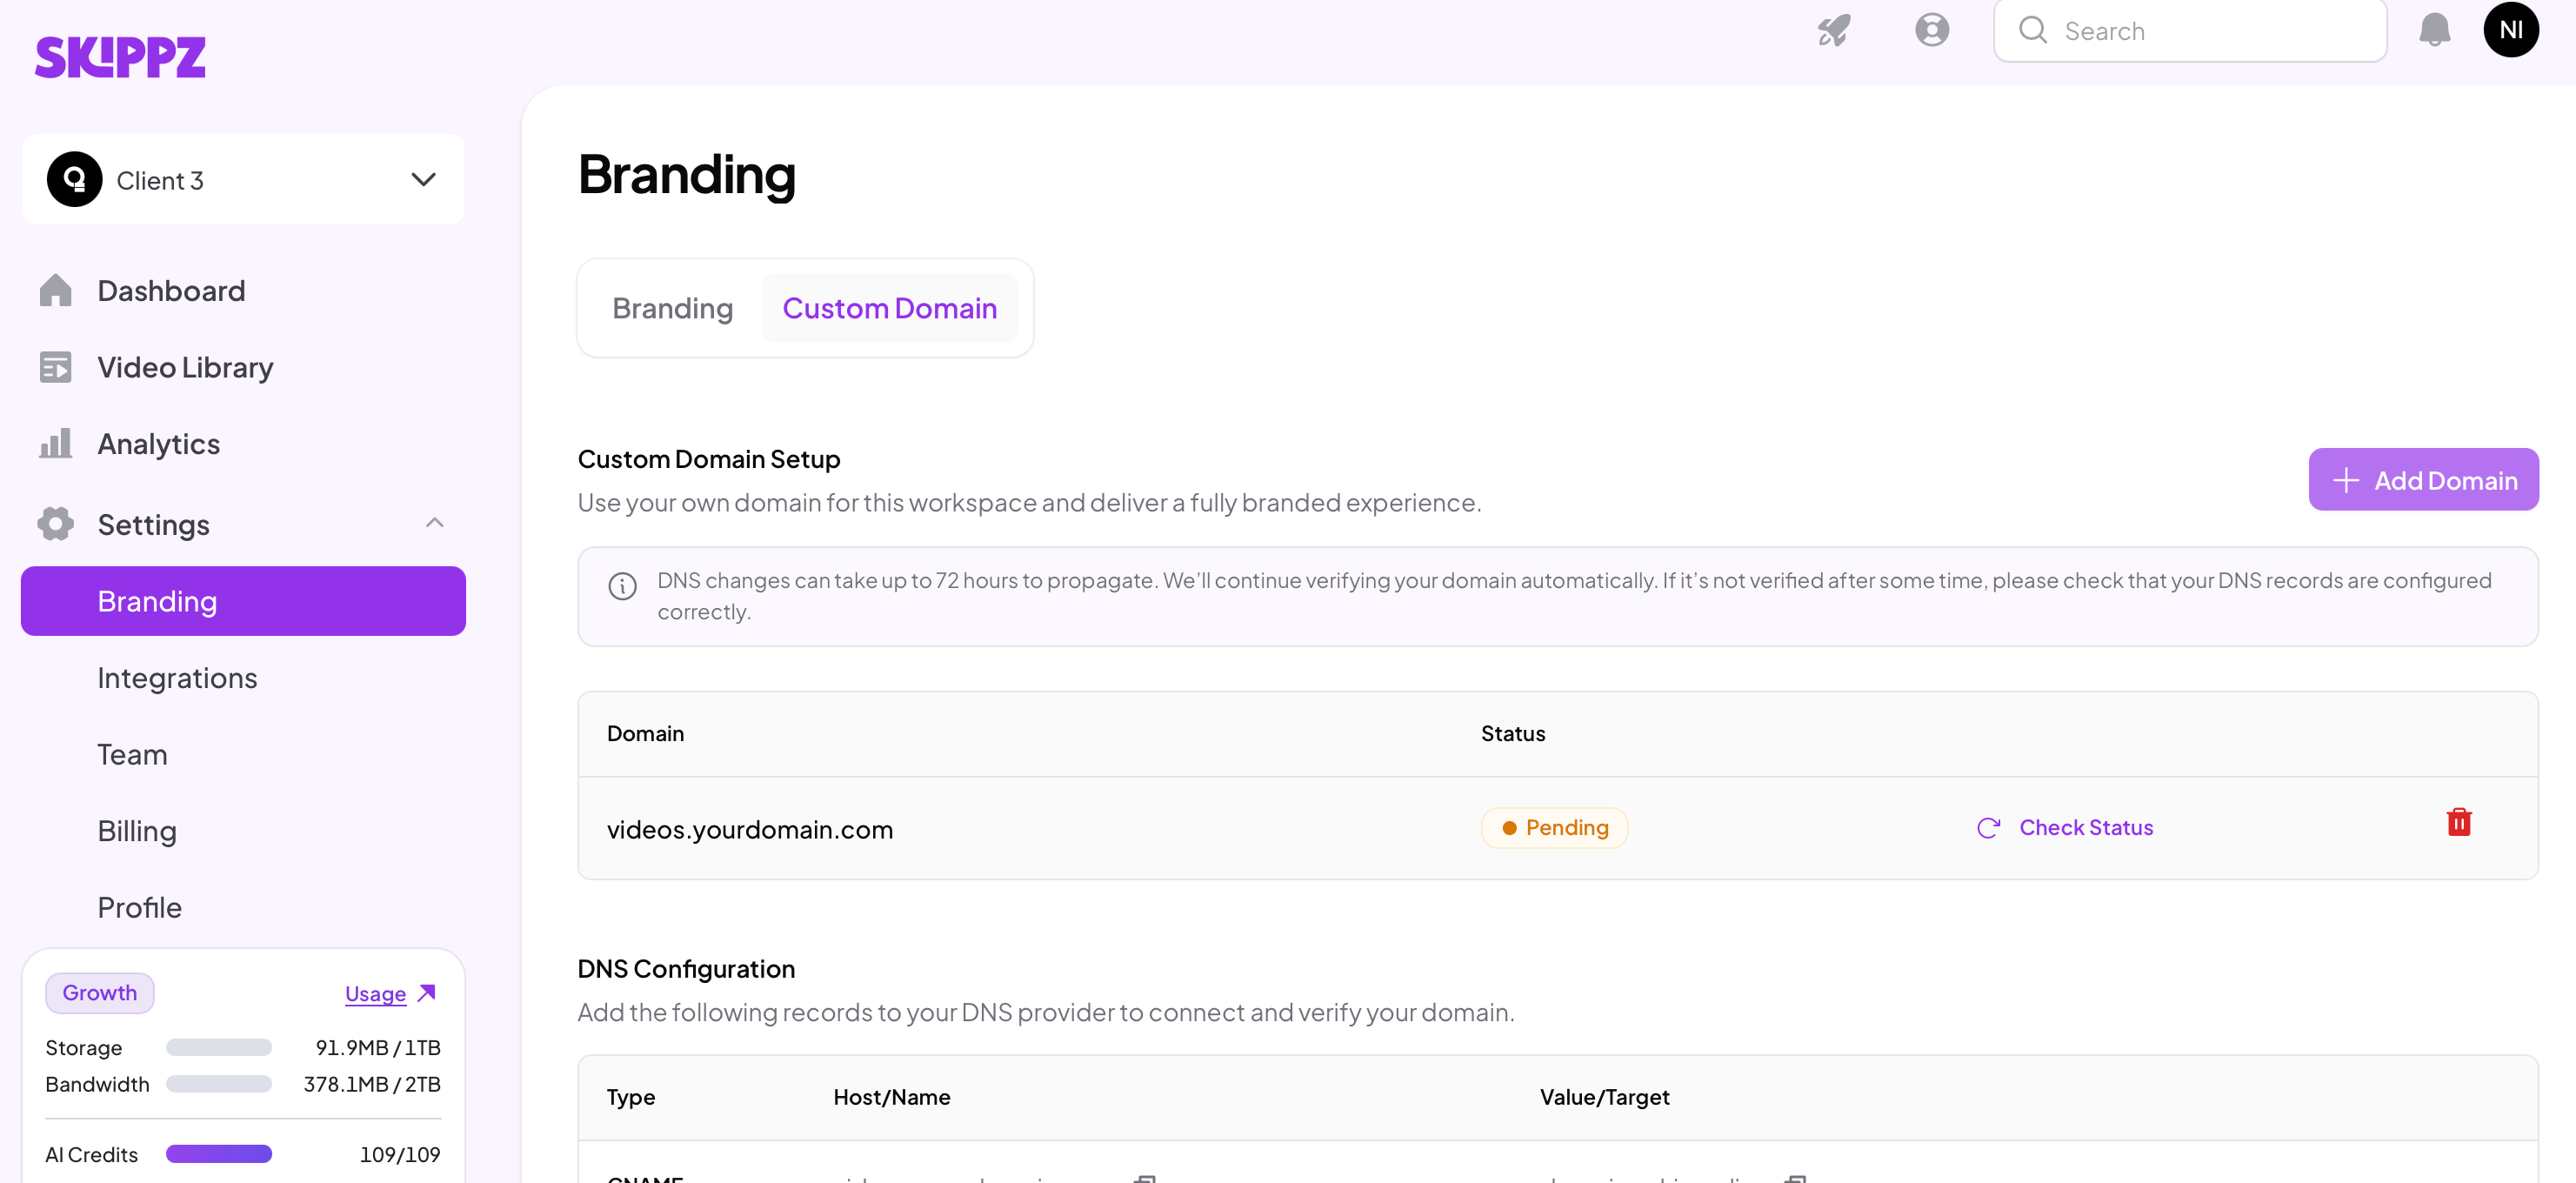
On the Pro plan and up, you can serve your share pages, playlists, spotlights and embeds from your own domain instead of skippz.com. Add one in either place:
The gear on a workspace in the switcher, then Add a custom domain.
Settings, then Branding, then Custom domain, on the workspace you want it on.
We give you a CNAME record and a TXT record to add at your DNS provider. Copy the exact Host and Value shown in your screen.
We recommend pointing a subdomain at Skippz, like video.yourdomain.com, rather than your root domain.
One thing that trips people up: many DNS providers, Cloudflare included, automatically add your domain to the host field for you. We show the full host, for example video.yourdomain.com, but your provider may only want the part in front, just video. The TXT host works the same way: we show v.video.yourdomain.com, and your provider may only want v.video. Enter the host the way your provider expects, and enter the Value fields exactly as shown.
If you use Cloudflare, turn the proxy off for these records, so the cloud icon is grey rather than orange. Skippz installs its own SSL certificate, and Cloudflare's proxy gets in the way of that. This is also the first thing to check if a domain will not verify.
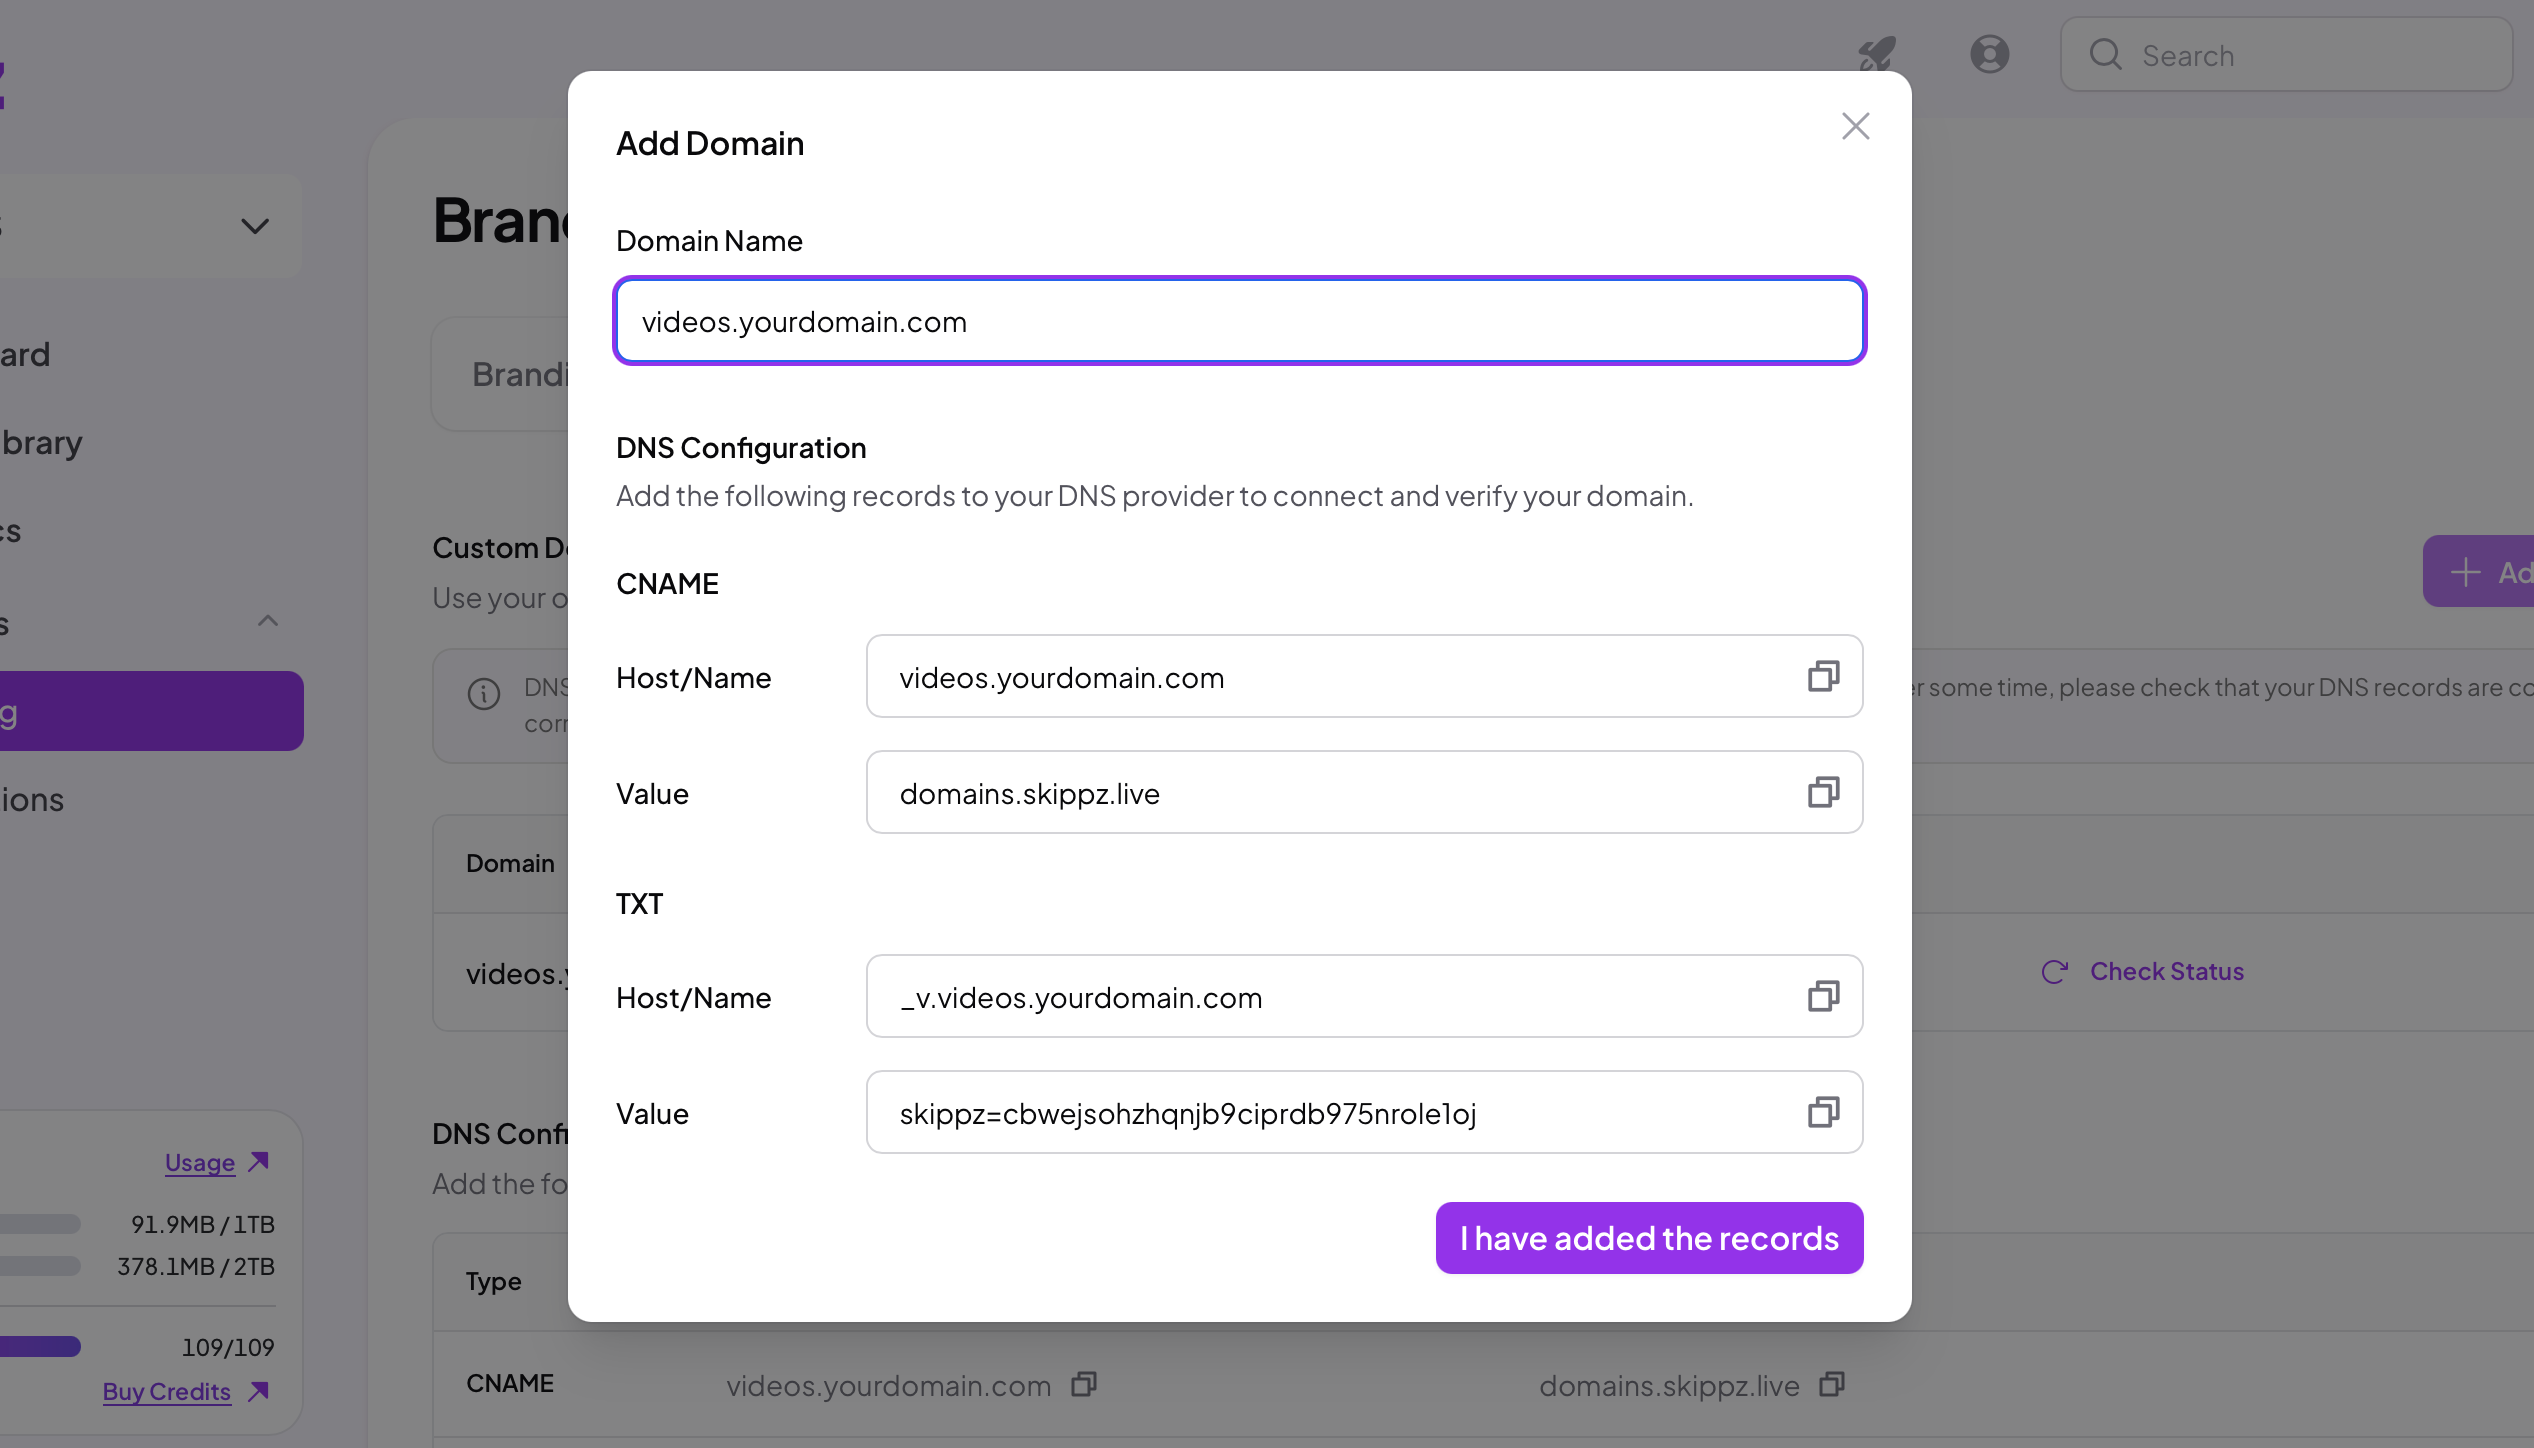
After you add the records, give DNS time to propagate. You can check and verify manually, or we verify periodically from our side. Once the domain is active, log out and back in to see it fully take effect.
This matters, so it is worth being clear about. A share link or embed is created with whatever domain is active at that moment, and changing your workspace domain later does not rewrite links you have already shared.
Once a domain is active, every new share page, playlist, spotlight and embed uses it. Anything created before stays on the domain it was made with.
If you switch from one custom domain to another, your existing shared links and embeds keep pointing at the old domain. They will not update on their own, and they will stop working once that old domain is gone. You will need to copy the new code and replace them wherever you have used them.
We cannot redirect from a domain we do not control, which is why this step is manual. The practical advice: settle on your domain before you share widely, and only change it when you are ready to update the embeds already out in the world.
Team and collaboration