company logo

Help center

Return HomeLogin/Sign up
All collectionsSpotlightHow to Create Your First Spotlight

How to Create Your First Spotlight

Learn how to create a Spotlight from start to finish, with separate steps for Showcase and Vertical based on the Spotlight type you choose.

Creating a Spotlight starts with the same first steps. Once you choose your Spotlight type, the creation wizard changes based on whether you select Showcase or Vertical.

Start creating your Spotlight

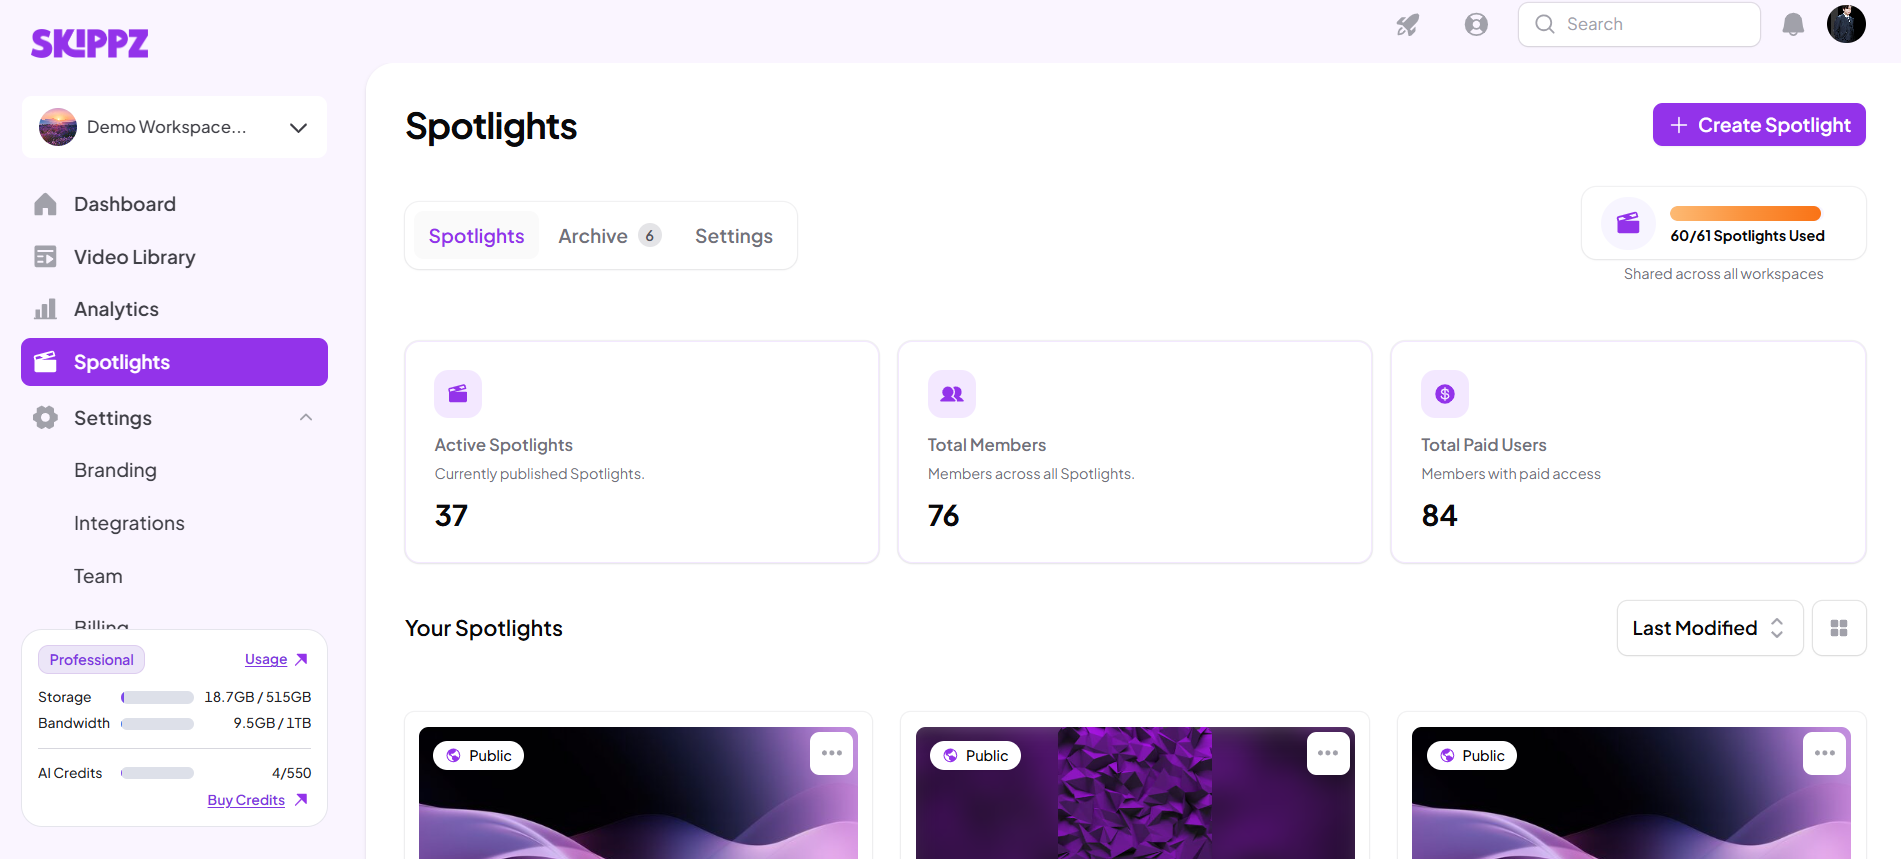
  1. Open your Spotlight Dashboard.

    SKIPPZ admin Spotlights screen shows navigation, spotlight tabs and usage metrics, plus a grid of public spotlight cards. Visible: Spotlights, Create Spotlight, Archive, Settings, 60/61 Spotlights Used, Active Spotlights.

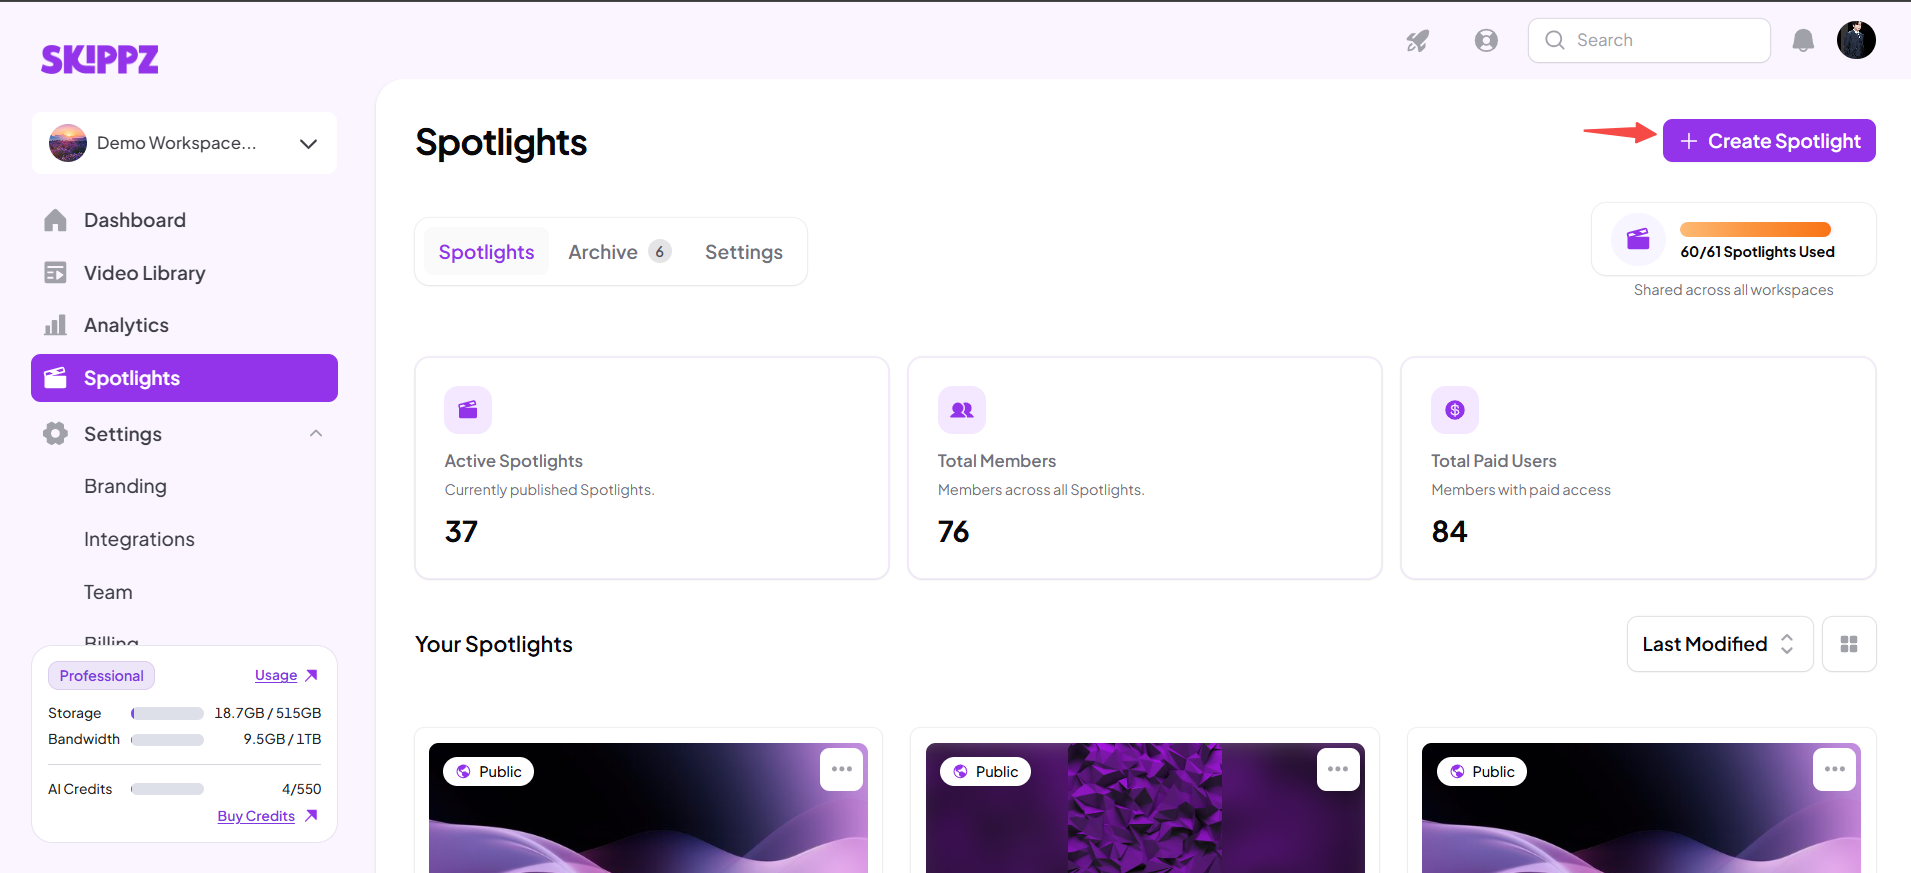
  2. Select Create Spotlight.

    Spotlights dashboard with a red arrow pointing to the Create Spotlight button above usage totals and spotlight cards. Visible: SKIPPZ, Demo Workspace..., Dashboard, Video Library, Analytics, Spotlights.

  3. Choose the Spotlight type you want to create.
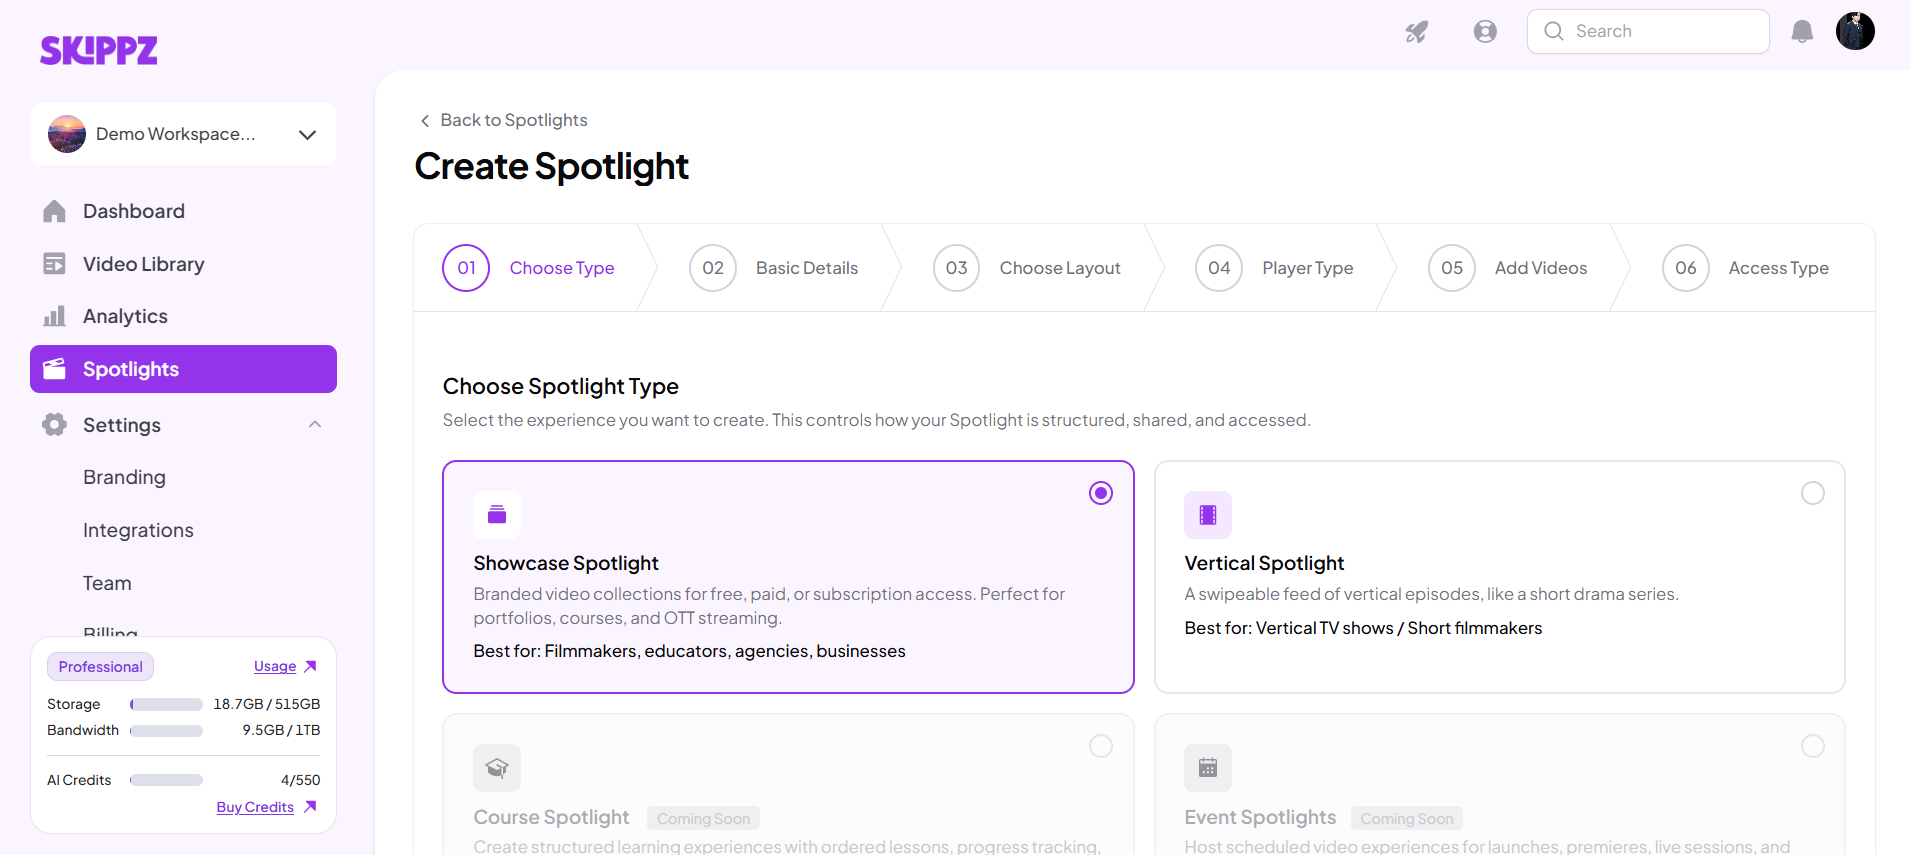
    The Create Spotlight screen is on step 1, Choose Type, with Showcase Spotlight selected and Vertical Spotlight available; Course Spotlight and Event Spotlights are marked Coming Soon. Visible: SKIPPZ, Demo Workspace..., Dashboard, Video Library, Analytics, Spotlights.

  4. Select Continue to start setting up your Spotlight.

You can choose:

  • Showcase — supports both horizontal and vertical videos and includes options for layouts and player types.
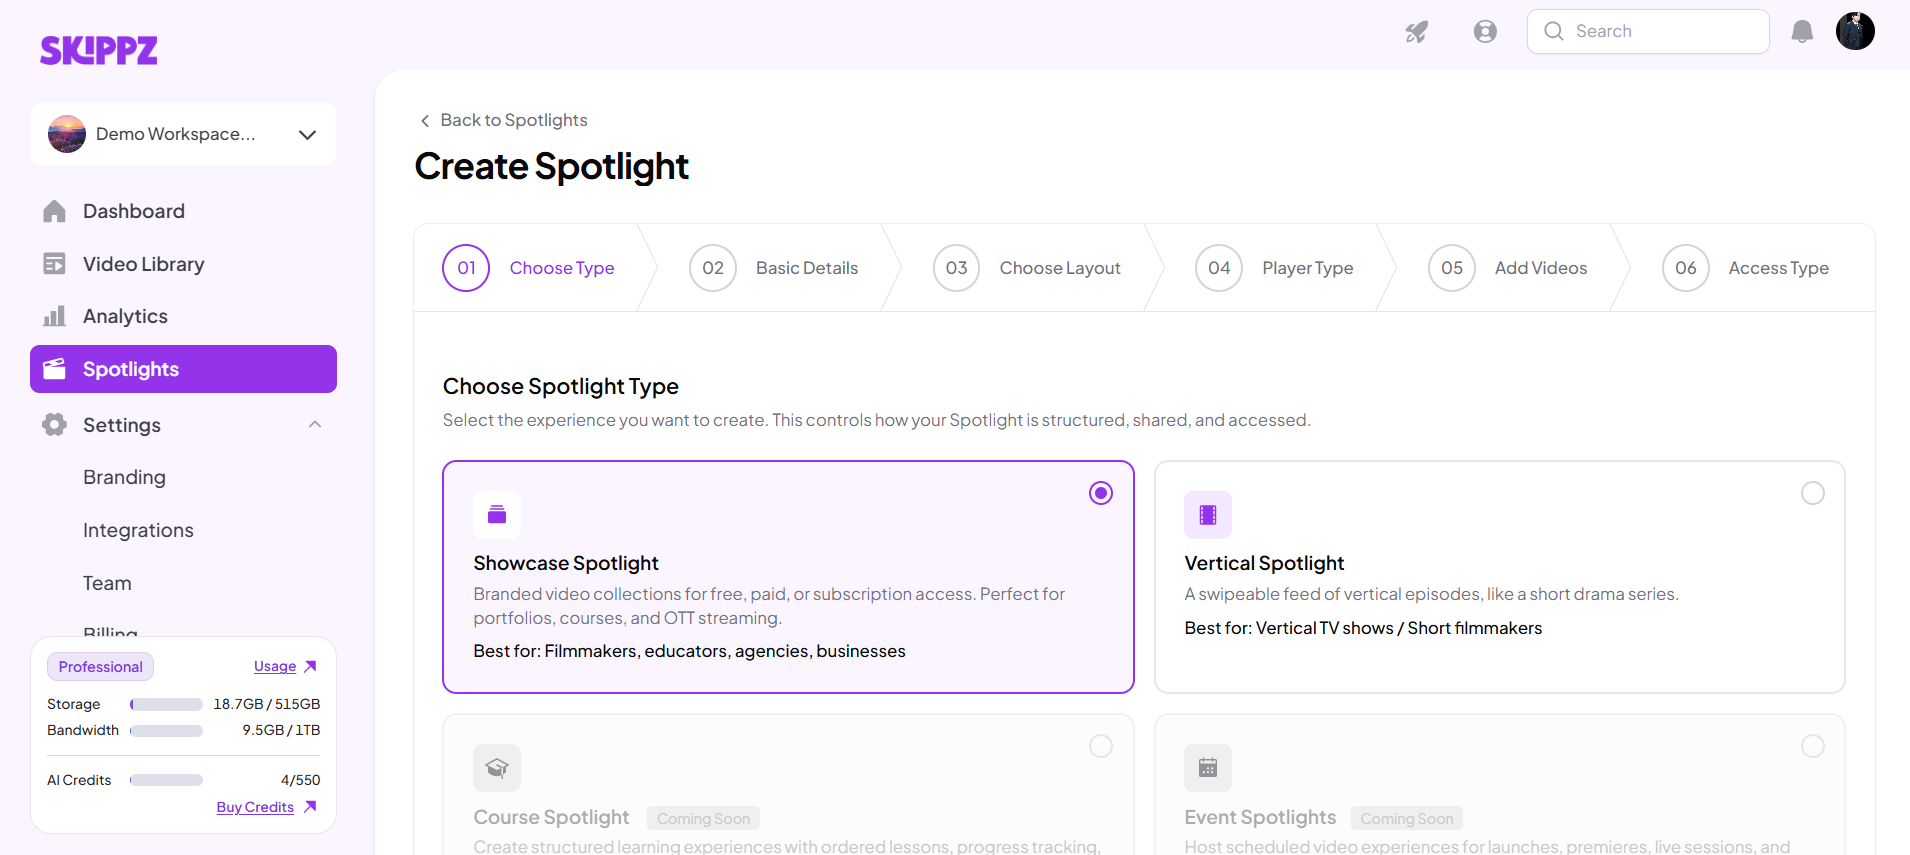
    The Create Spotlight screen shows step 1, Choose Type, with Showcase Spotlight selected and Vertical Spotlight available. Visible: Back to Spotlights, Create Spotlight, Choose Type, Basic Details, Choose Layout, Player Type.

  • Vertical — is designed for vertical-only videos and provides a vertical viewing experience across desktop and mobile.
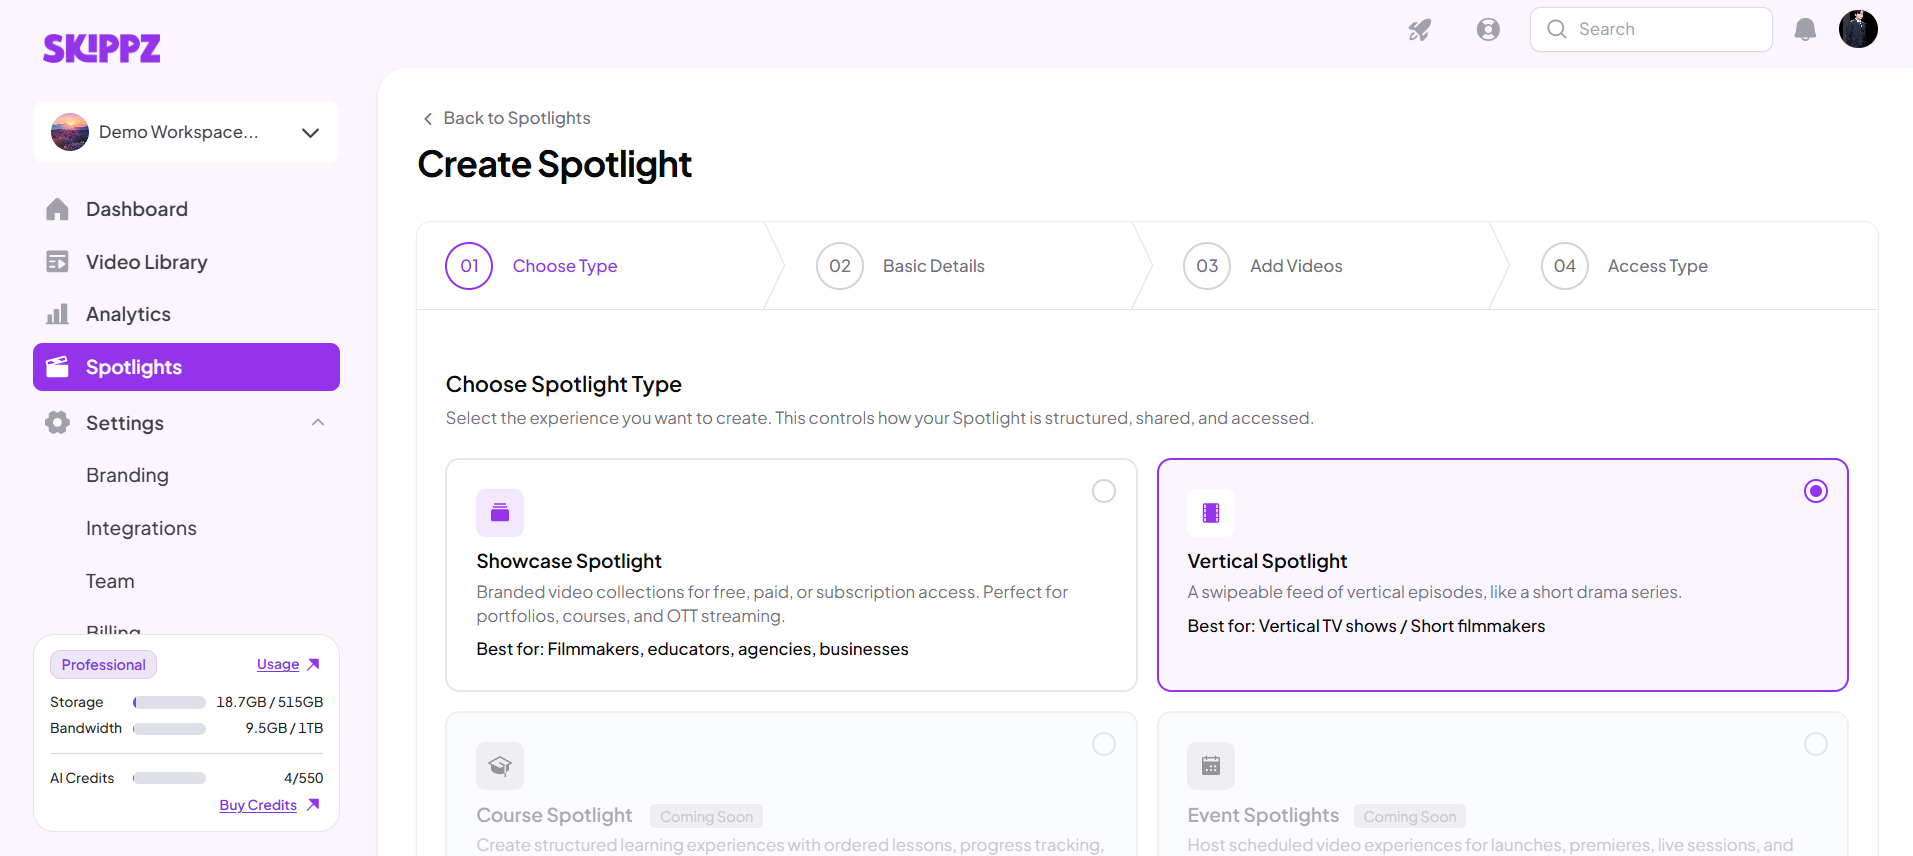
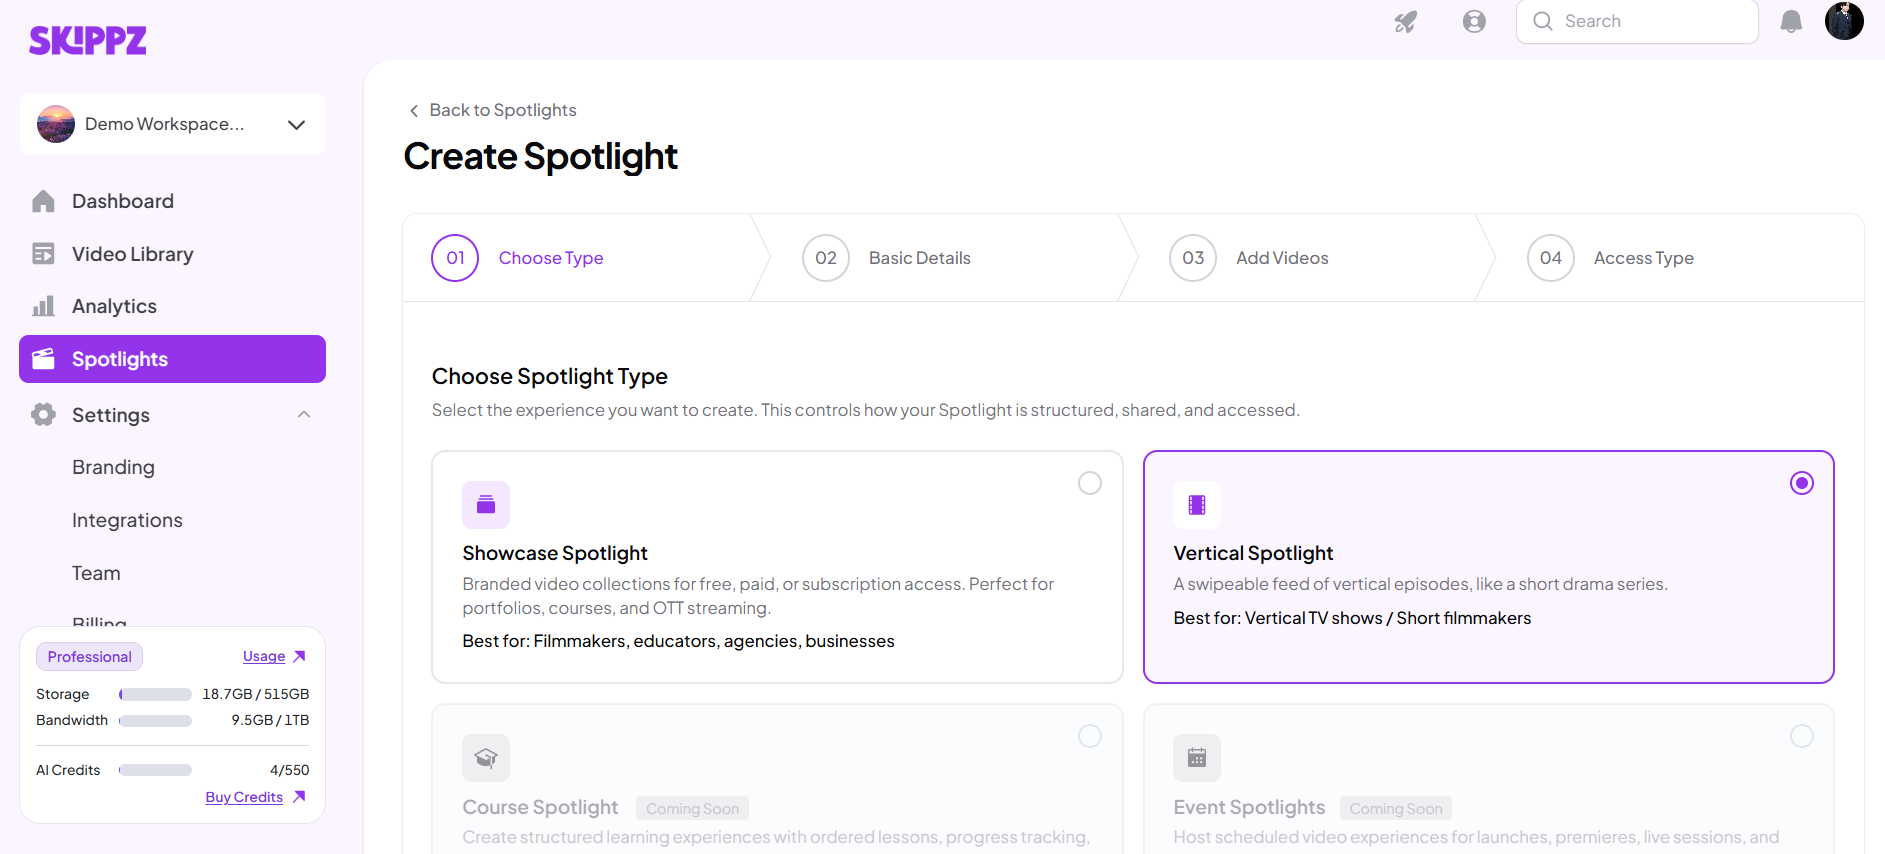
    The Create Spotlight screen is on step 1, Choose Type, with Vertical Spotlight selected and Showcase Spotlight, Course Spotlight, and Event Spotlights also shown. Visible: Back to Spotlights, Create Spotlight, Choose Type, Basic Details, Add Videos, Access Type.

After you choose your Spotlight type, the wizard displays the steps available for that type.


Create a Showcase Spotlight

If you choose Showcase, the creation wizard includes these steps:

Basic Details → Layout → Player Type → Add Videos → Access Type
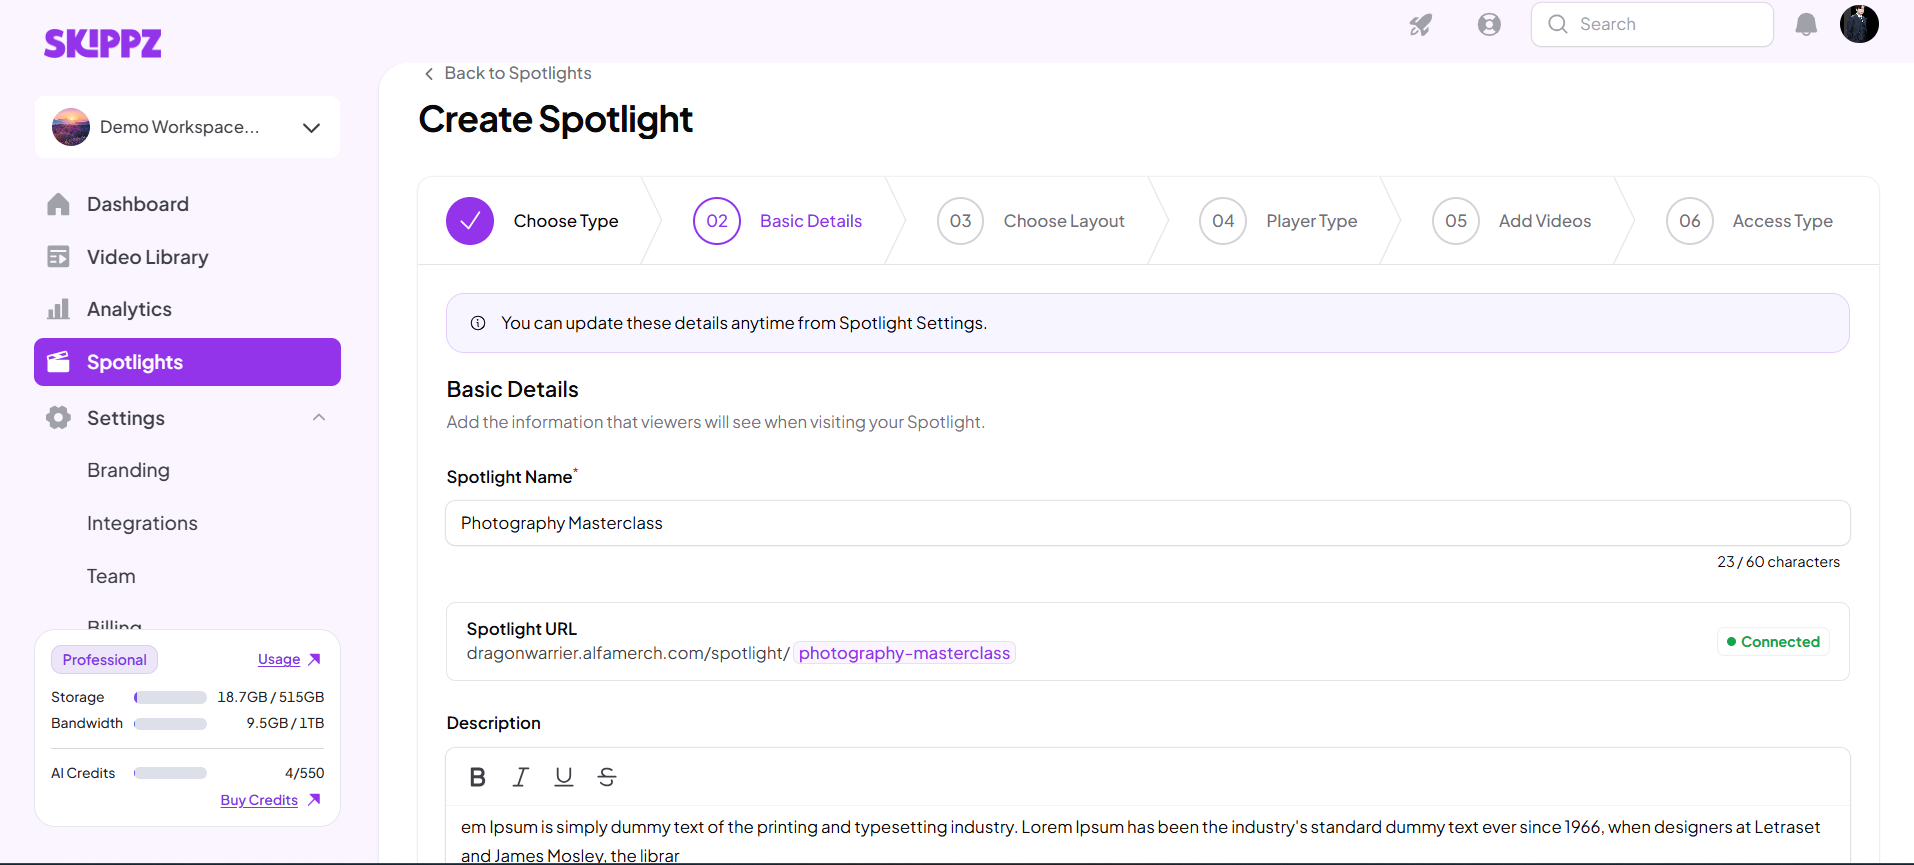
Step 1: Add your Basic Details

The Create Spotlight screen is on step 02 Basic Details, showing the Spotlight Name, connected Spotlight URL, and Description fields. Visible: Create Spotlight, Choose Type, Basic Details, Choose Layout, Player Type, Add Videos.

Enter the required basic information for your Showcase Spotlight.

Once you've completed the details, continue to the next step.
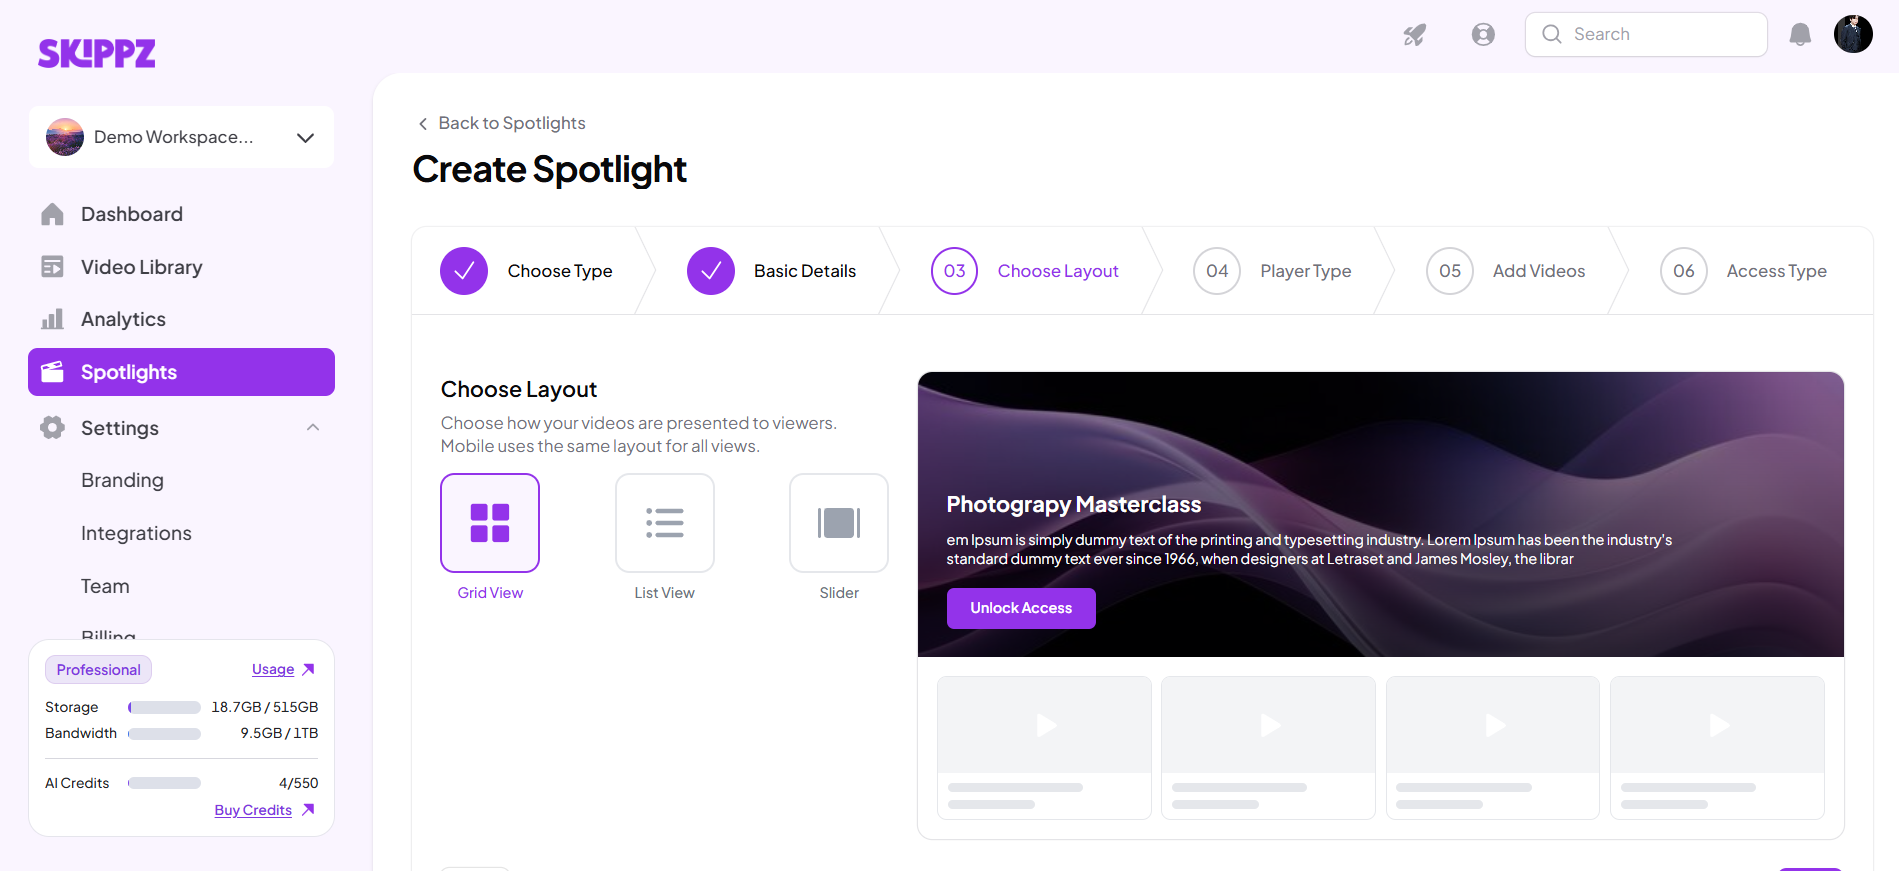
Step 2: Choose a Layout

The Create Spotlight workflow is on step 03, Choose Layout, with Grid View selected and a preview of the spotlight layout on the right. Visible: Create Spotlight, Choose Type, Basic Details, Choose Layout, Player Type, Add Videos.

Choose how your videos will be displayed in your Spotlight.

Showcase provides three layout options:

  • Grid View — displays multiple videos together in a grid.

  • List View — displays videos in a structured list.

  • Slider View — lets viewers browse videos through a slider.

Choose the layout that best fits how you want your audience to explore your content.
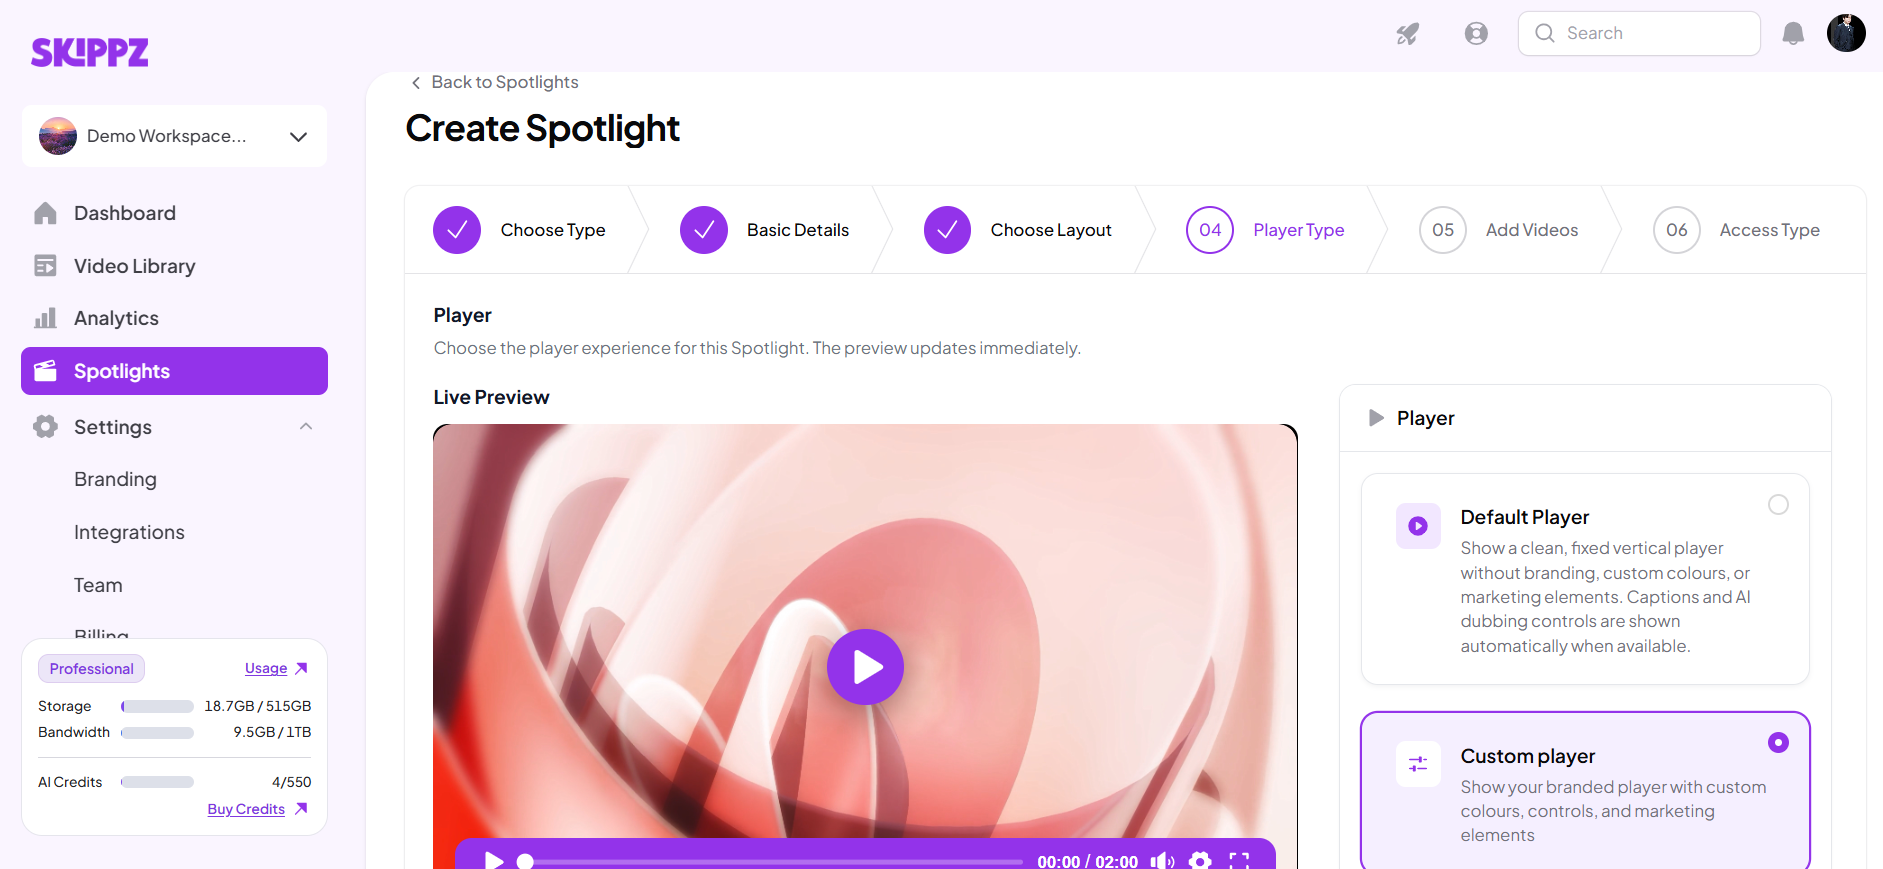
Step 3: Choose a Player Type

The Create Spotlight wizard is on step 04 Player Type, showing a live video preview and Default Player and Custom player options, with Custom player selected. Visible: Back to Spotlights, Create Spotlight, Choose Type, Basic Details, Choose Layout, Player Type.

Choose how the video player should appear when your audience watches your videos.

Showcase provides two player options:

Default Player

The Default Player provides a simple video viewing experience without additional branding or marketing elements.

It includes the basic player controls available to viewers, such as:

  • Volume

  • Captions

  • Audio options

  • Full screen

Choose the Default Player if you want a simple, straightforward video player.

Custom Player

The Custom Player lets you provide a more branded viewing experience.

It includes your branding and marketing elements within the player experience, along with the available player controls.

Choose the Custom Player when you want the video player to feel more connected to your brand and Spotlight experience.

Player Type is available for Showcase Spotlight only. Vertical Spotlight does not include a Player Type selection.
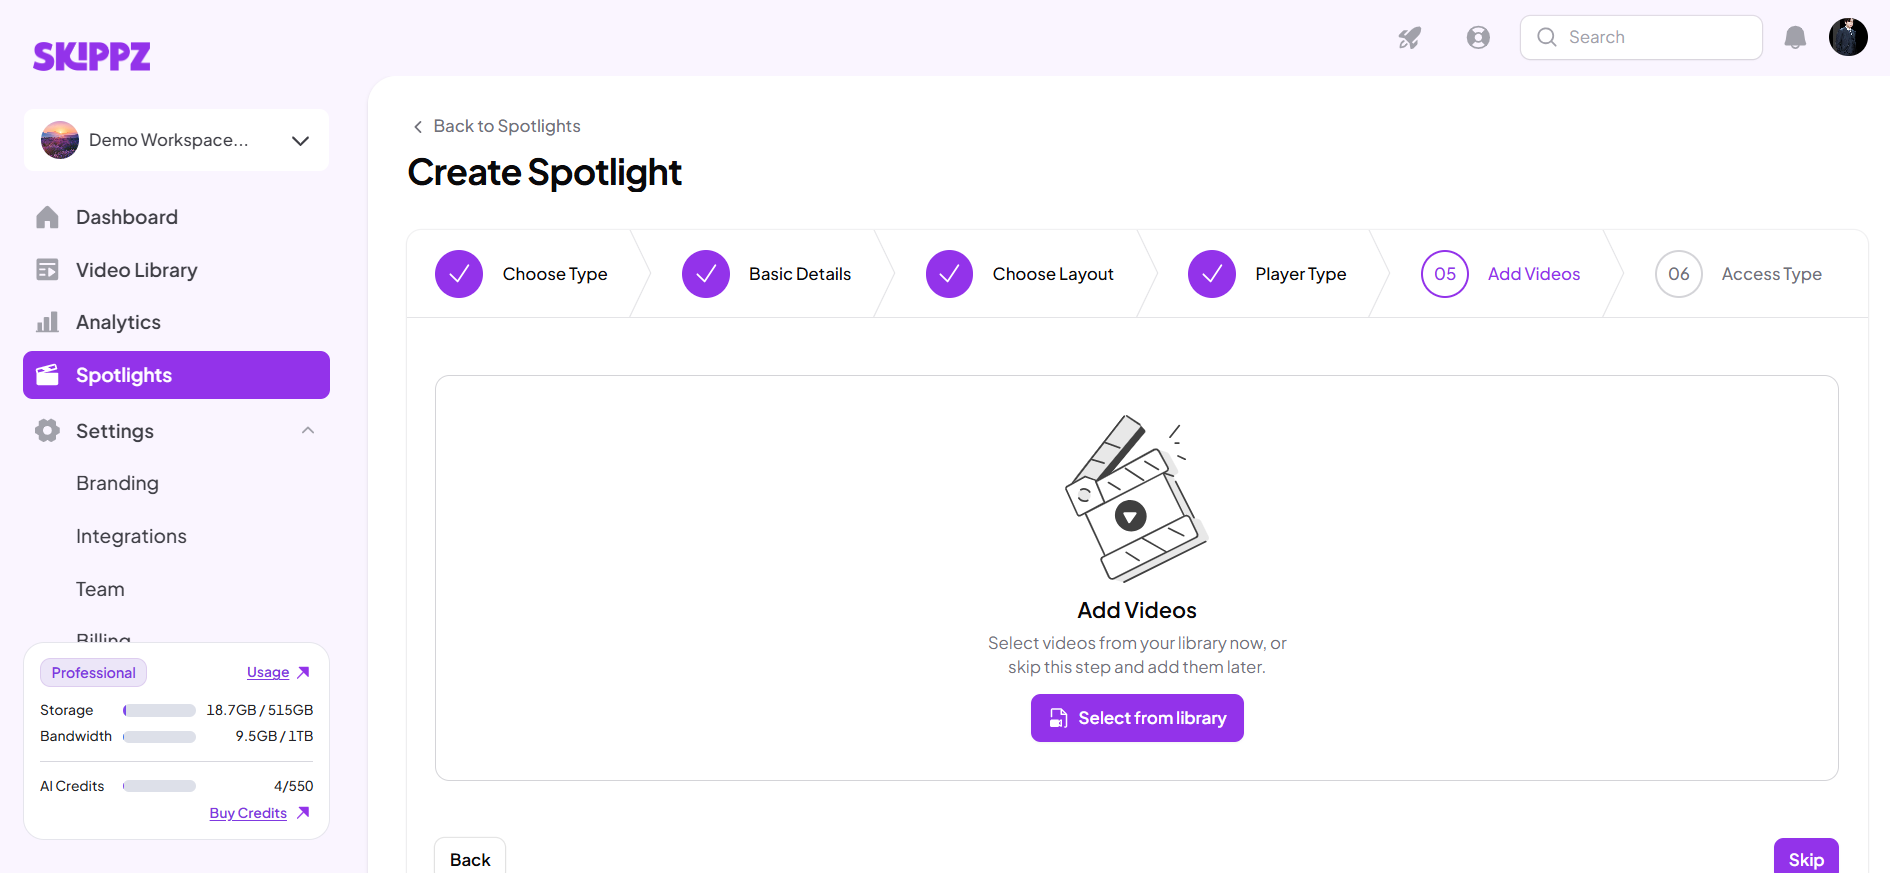
Step 4: Add your Videos

The Create Spotlight workflow is on step 05, Add Videos, with an empty video selection area and options to select from the library or skip. Visible: SKIPPZ, Demo Workspace..., Dashboard, Video Library, Analytics, Spotlights.

Add the videos you want to include in your Showcase Spotlight.

Showcase supports:

  • Horizontal videos

  • Vertical videos

You can use both formats within the same Showcase Spotlight.
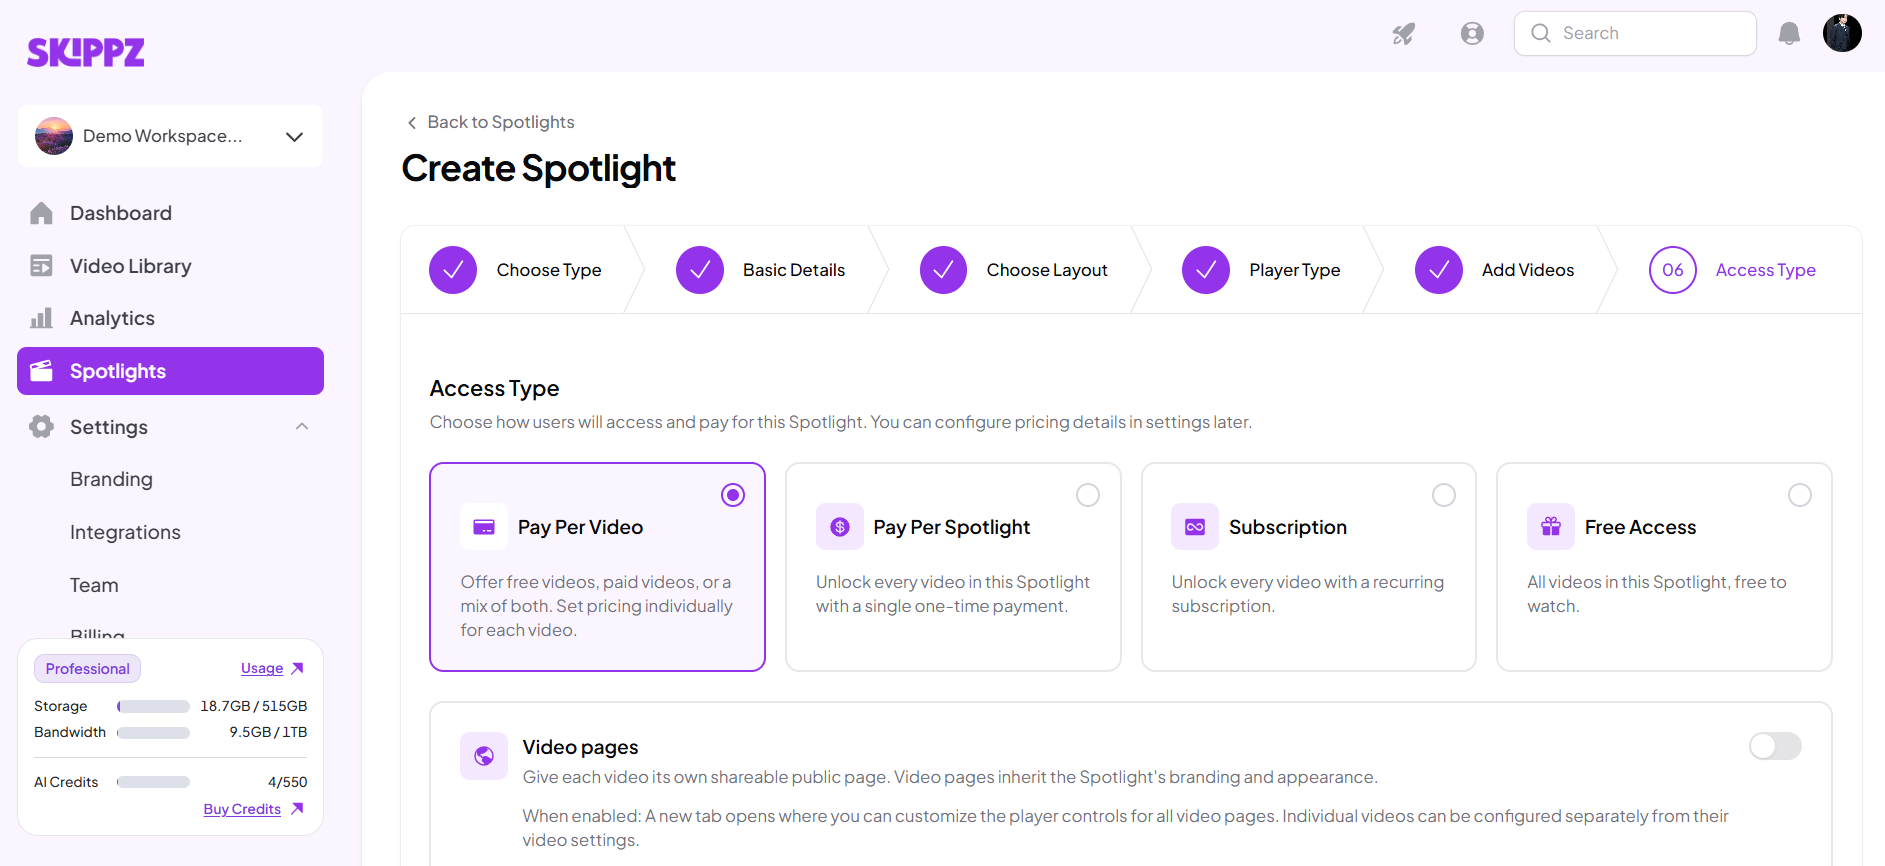
Step 5: Choose your Access Type

SKIPPZ Create Spotlight wizard on the Access Type step, with Pay Per Video selected and Video pages turned off. Visible: SKIPPZ, Demo Workspace..., Dashboard, Video Library, Analytics, Spotlights.

Choose how your audience will access your content.

Showcase supports:

  • Free

  • Pay Per Video — Buy

  • Pay Per Video — Rent

  • Pay Per Spotlight — Buy

  • Pay Per Spotlight — Rent

  • Subscription

Once you've selected your access type, complete the setup and save or create your Spotlight.
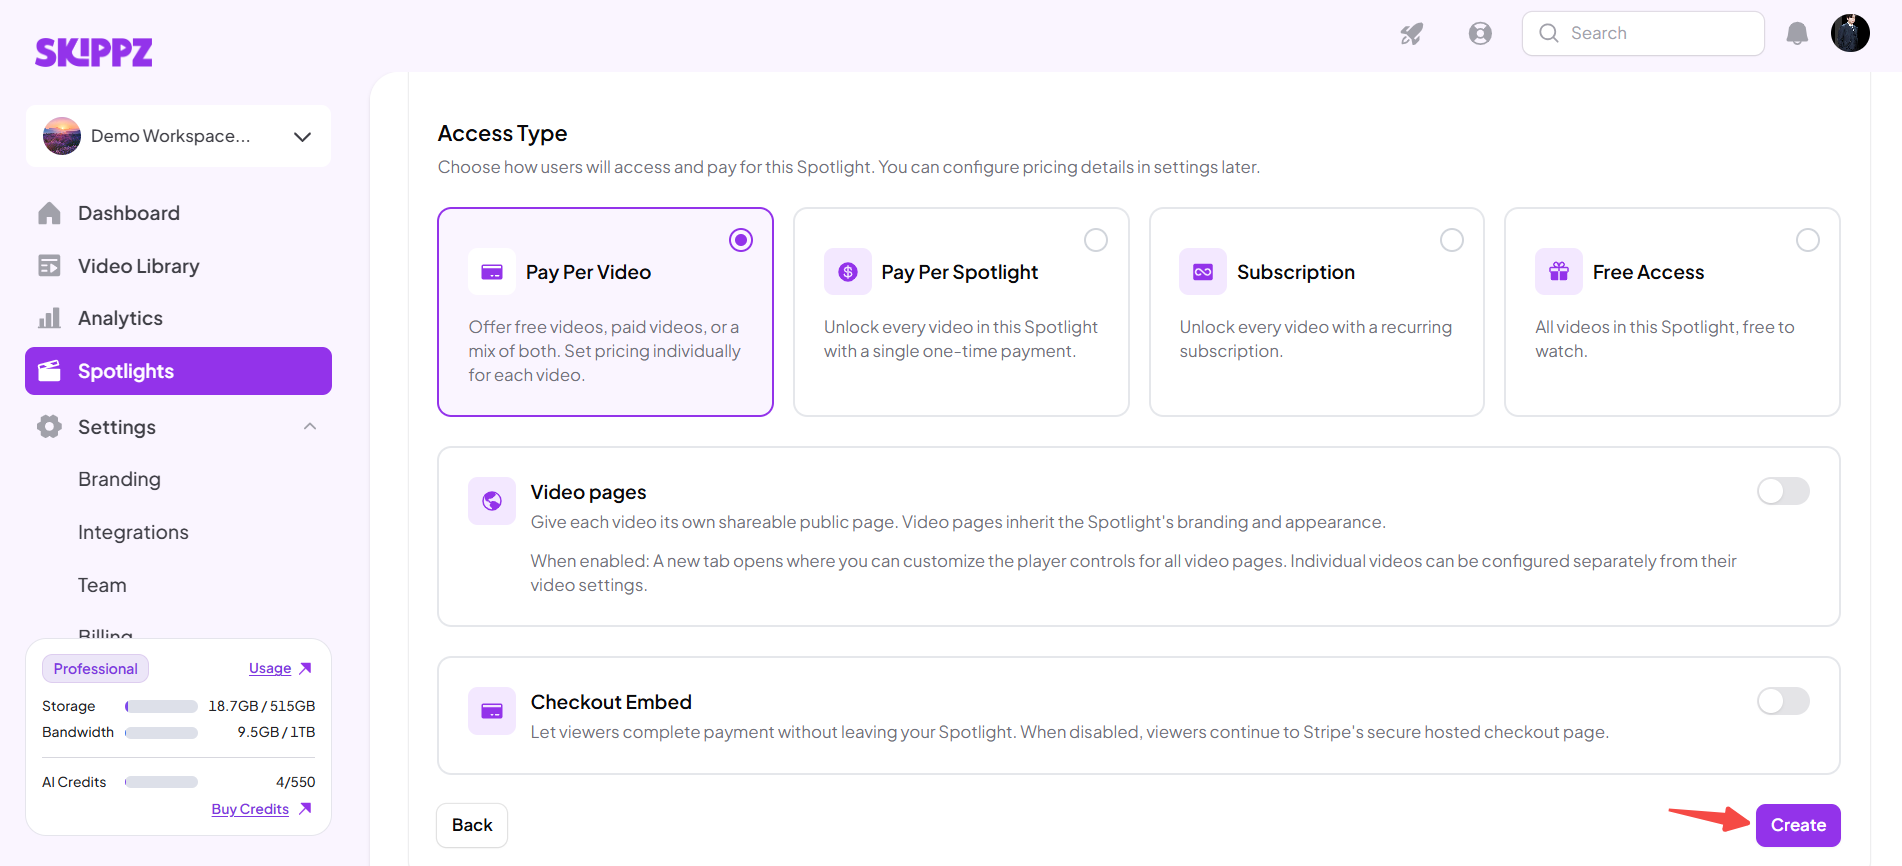
Spotlight creation Access Type screen with Pay Per Video selected and a red arrow pointing to the Create button. Visible: Access Type, Pay Per Video, Pay Per Spotlight, Subscription, Free Access, Video pages.


Create a Vertical Spotlight

Create Spotlight screen on the Choose Type step, with Vertical Spotlight selected and Showcase Spotlight, Course Spotlight, and Event Spotlights also shown. Visible: Create Spotlight, Choose Type, Basic Details, Add Videos, Access Type, Choose Spotlight Type.

If you choose Vertical, the creation wizard changes to a simpler flow:

Basic Details → Add Videos → Access Type

Step 1: Add your Basic Details

The Create Spotlight screen in Spotlights shows four setup steps and spotlight type cards, with Vertical Spotlight selected. Visible: Create Spotlight, Choose Type, Basic Details, Add Videos, Access Type, Choose Spotlight Type.

Enter the required basic information for your Vertical Spotlight.

Once complete, continue to the next step.

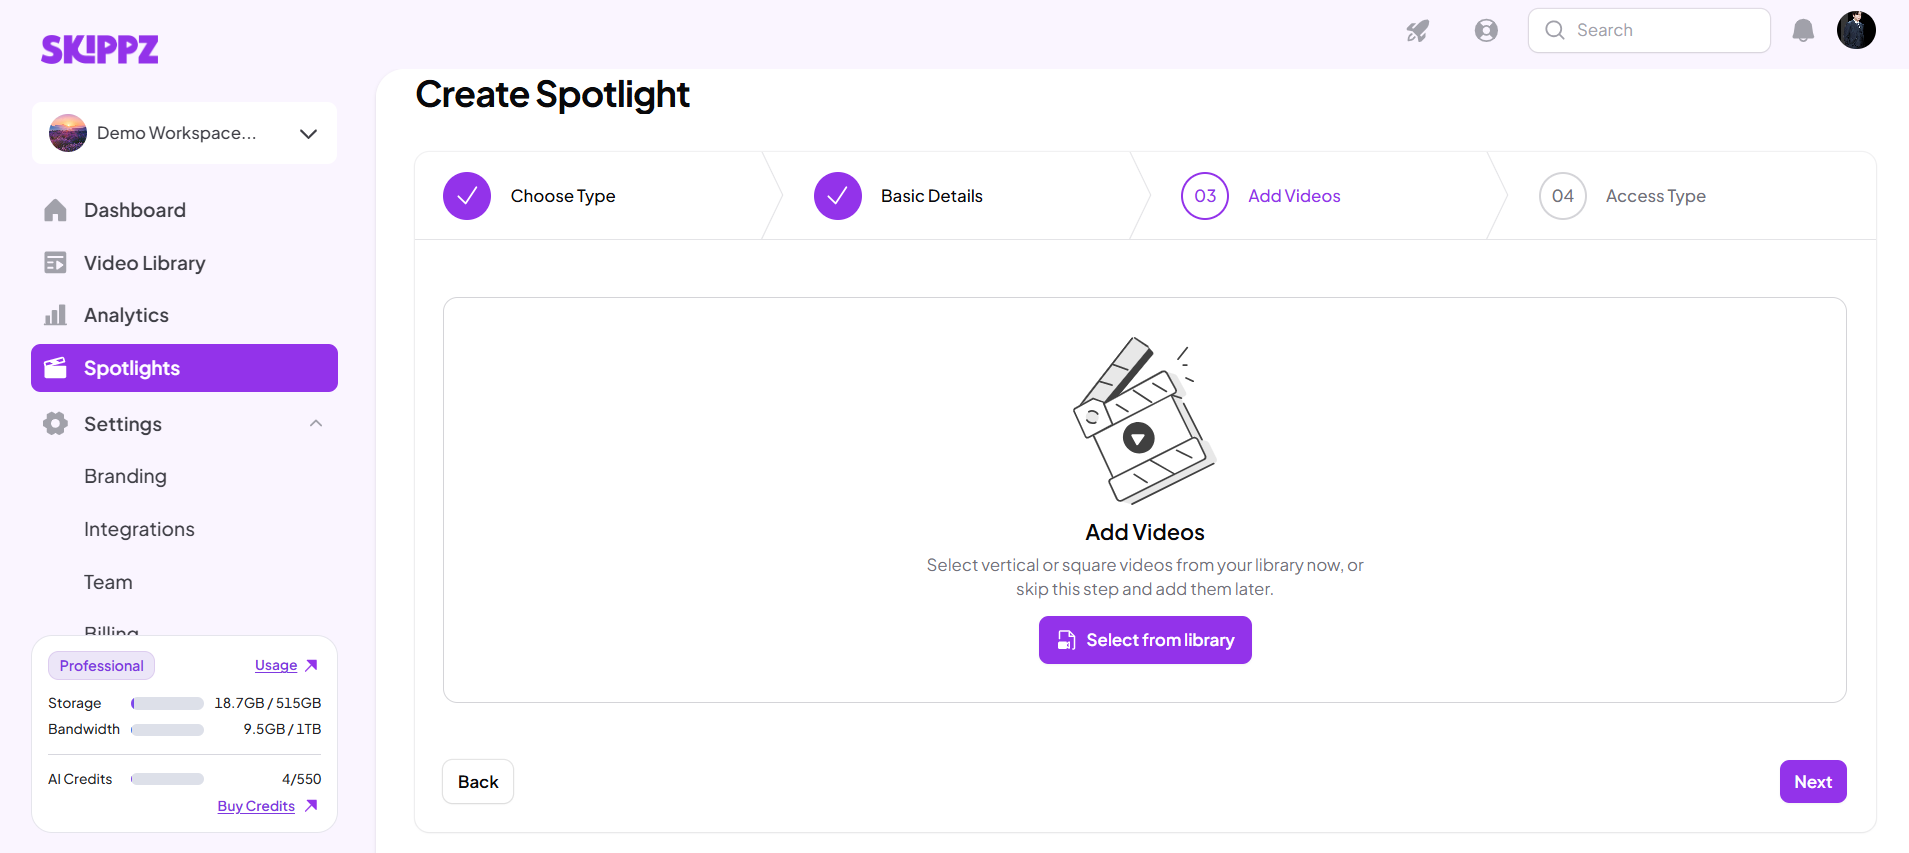
Step 2: Add your Videos

The Create Spotlight workflow is on step 3, Add Videos, with an option to select vertical or square videos from the library. Visible: Create Spotlight, Choose Type, Basic Details, Add Videos, Access Type, Select vertical or square videos from your library now, or skip this step and add them later.

Add the videos you want to include in your Vertical Spotlight.

Vertical Spotlight supports vertical-only videos.

The viewing experience works across desktop and mobile while keeping the content in a vertical format.

Step 3: Choose your Access Type

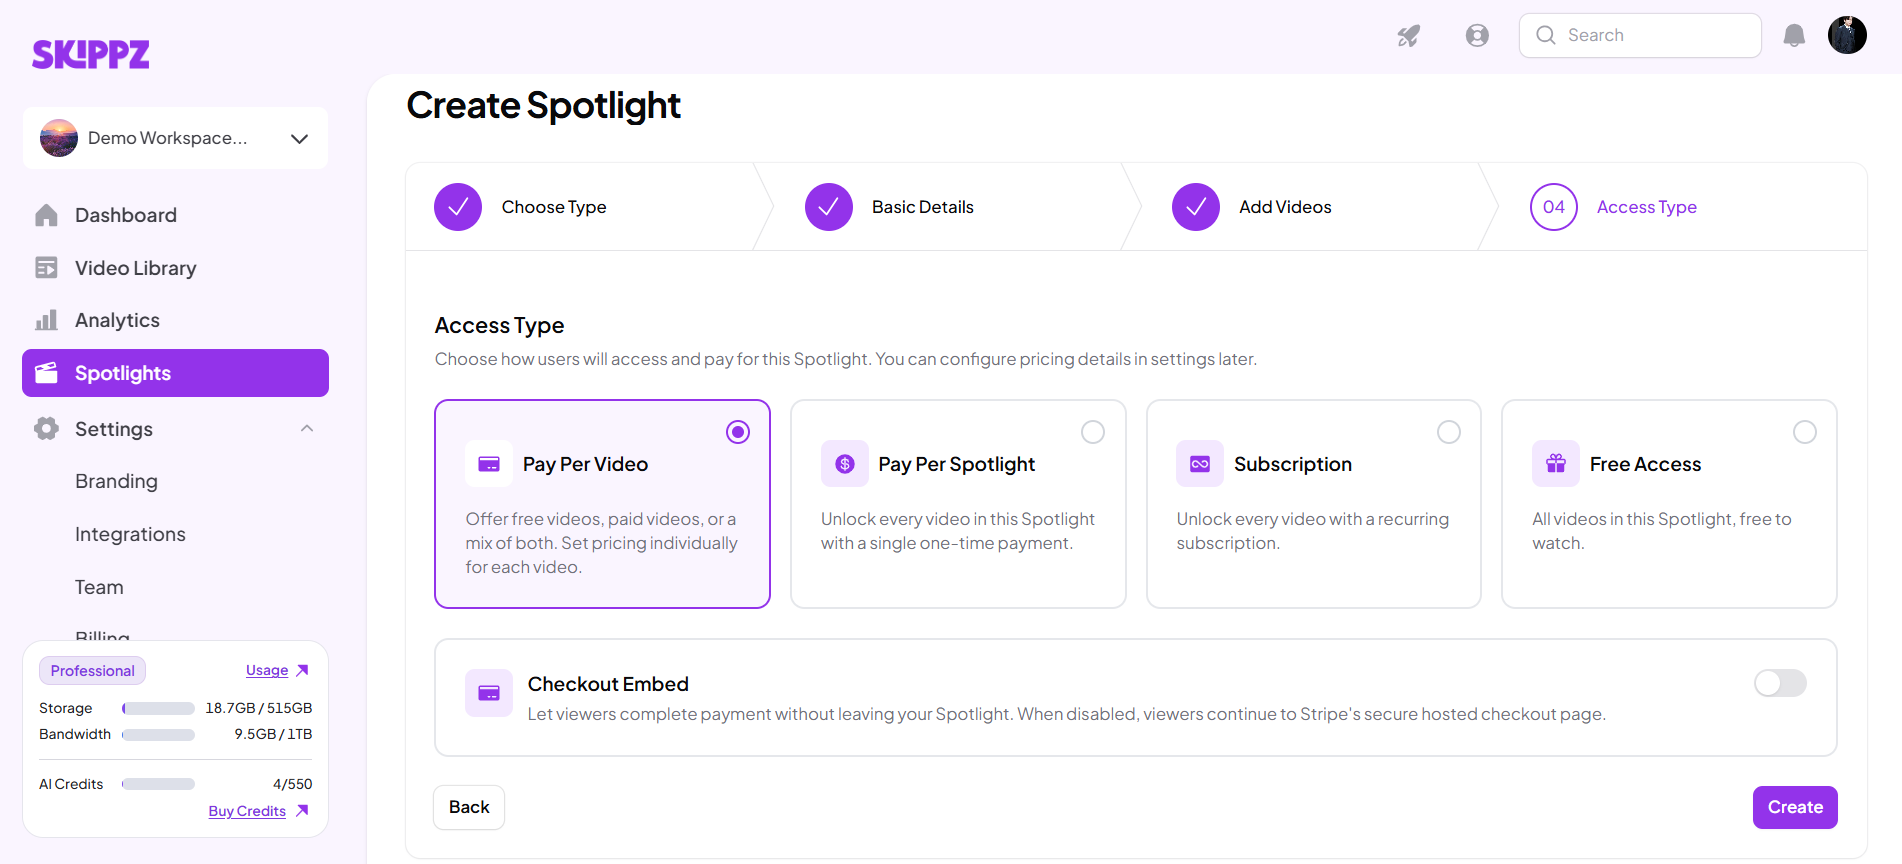
The Create Spotlight wizard is on the Access Type step, with Pay Per Video selected and the Checkout Embed toggle off. Visible: Create Spotlight, Choose Type, Basic Details, Add Videos, Access Type, Pay Per Video.

Choose how your audience will access your content.

Vertical supports:

  • Free

  • Pay Per Video — Buy

  • Pay Per Spotlight — Buy

  • Subscription

Rental is not available for Vertical Spotlight.

Once you've selected your access type, complete the setup and save or create your Spotlight.
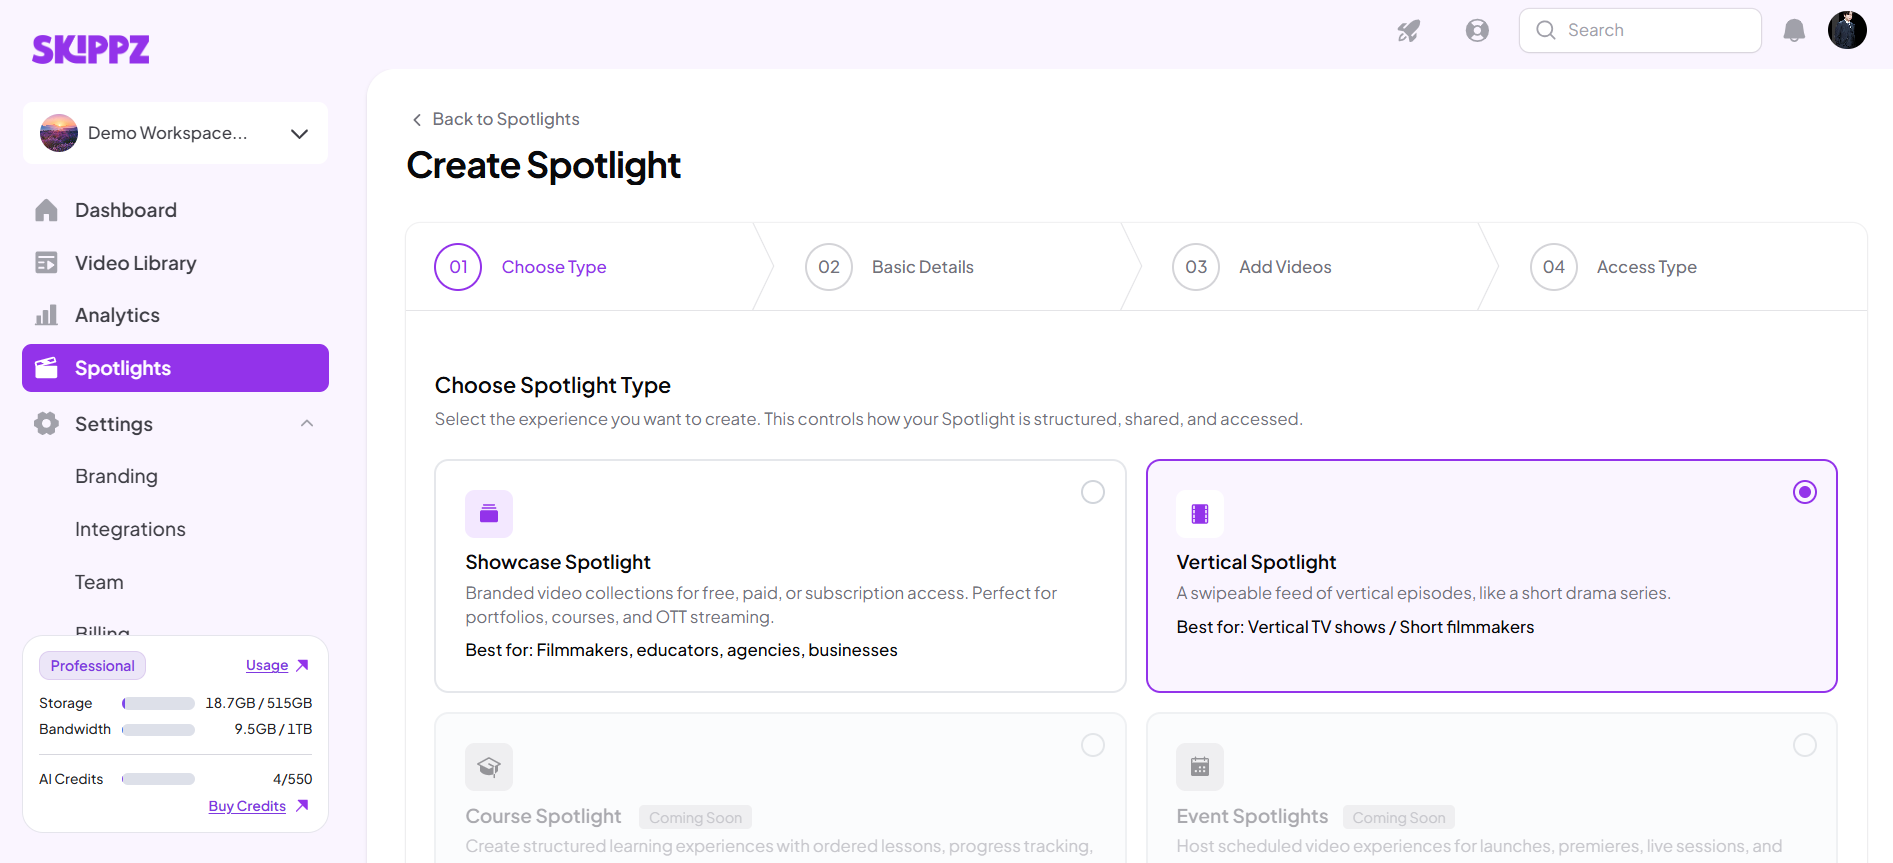
Vertical Spotlight does not include Layout or Player Type selection.


Save your Spotlight as a draft

You don't have to publish your Spotlight immediately.

After completing the available setup steps, you can save your Spotlight and continue working on it later.

An unpublished Spotlight remains as a draft in your Spotlight Dashboard.

You can open the draft again to continue editing.

Publish your Spotlight

When your Spotlight is ready, you can publish it from the editing flow.

You must have a Stripe account connected to your Skippz account to publish a Spotlight.

If Stripe isn't connected, you can continue creating and editing your Spotlight, but you won't be able to publish it.

Once published, your Spotlight is available to your audience. You can then share it and monitor its performance through Analytics.

Related articles

  • Understanding Spotlight Types — Learn about Showcase and Vertical and when each type is suitable.

  • Understanding Spotlight Layouts — Learn how Grid, List, and Slider layouts work in Showcase.

  • How to Choose the Right Access Type for Your Audience — Learn how to choose the best way for your audience to access your content.

Did this answer your question?
😞
😐
😁