Have a video you want to promote, sell, or rent without asking viewers to browse your entire collection? Video Pages help you direct your audience to a specific video through its own dedicated page. This makes it easier to promote individual tutorials, showcase valuable content, and give potential customers a direct way to access the video you're featuring.
With Spotlight, you can enable Video Pages for eligible Showcase Spotlights, configure individual video pricing and rental options, add a trailer, and copy a dedicated link to share. Follow the steps below to set up your Video Pages and prepare your videos for your audience.
Video Pages are available only for Showcase Spotlight when you select the Pay Per Video access option.
You can choose Pay Per Video in either of these places:
During Spotlight creation: Select Pay Per Video when configuring your Spotlight's access type.
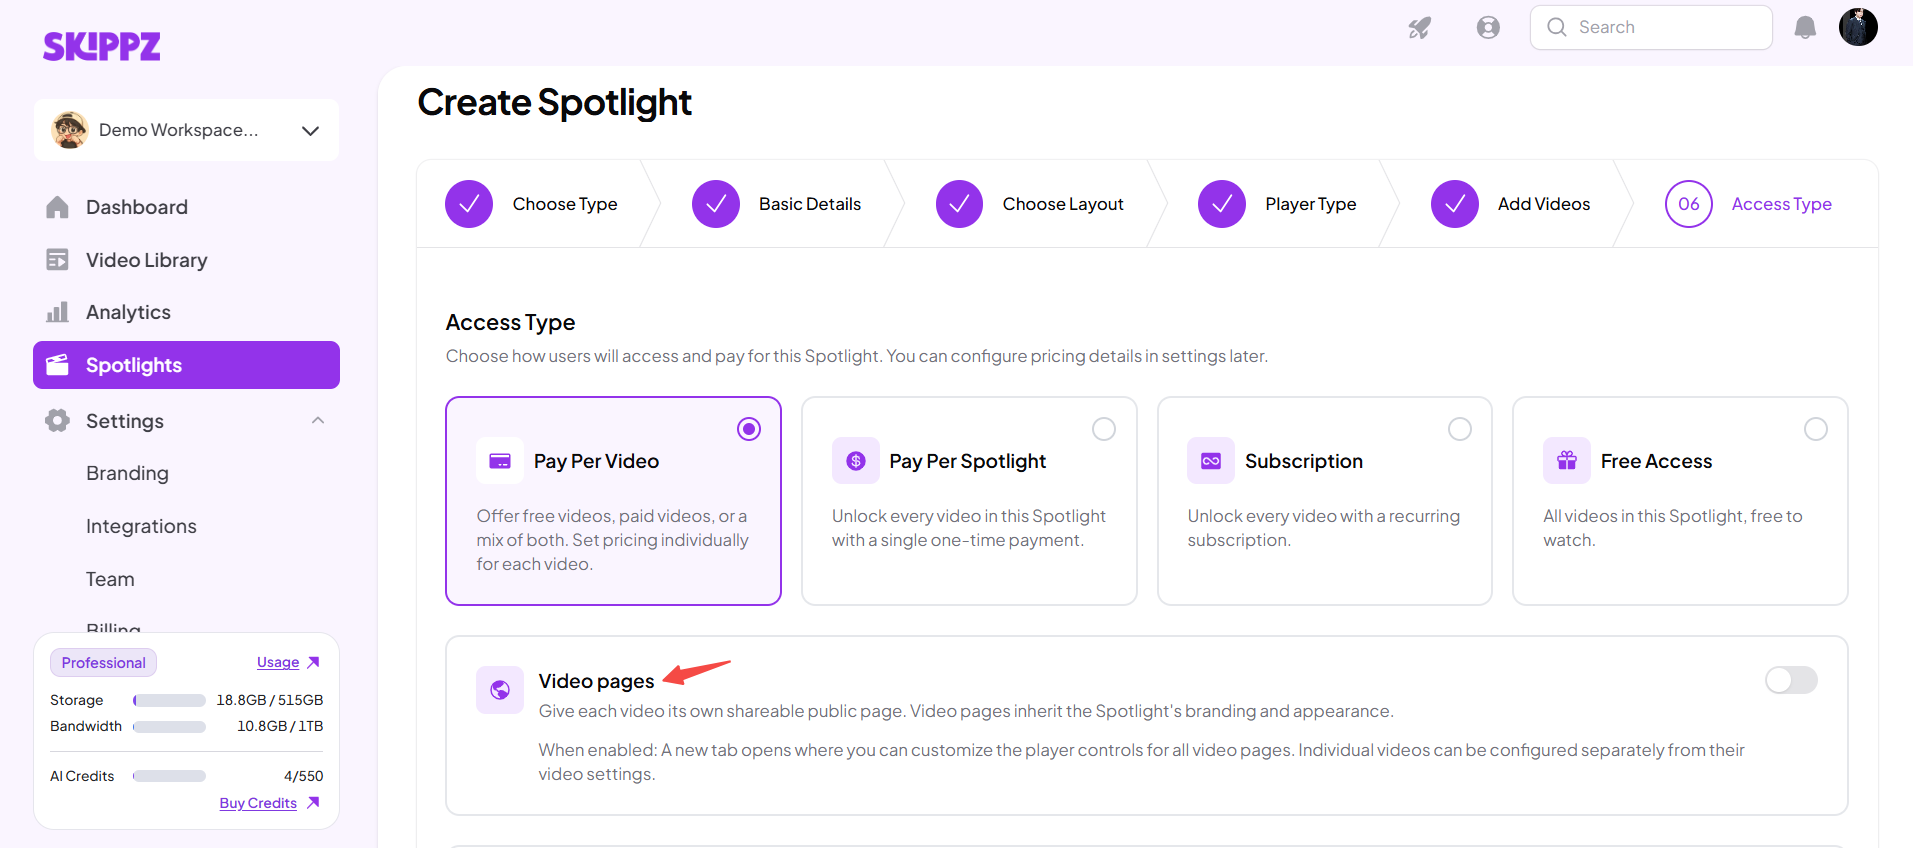
From the Spotlight Edit Flow: Open your existing Showcase Spotlight and go to the Monetization section.
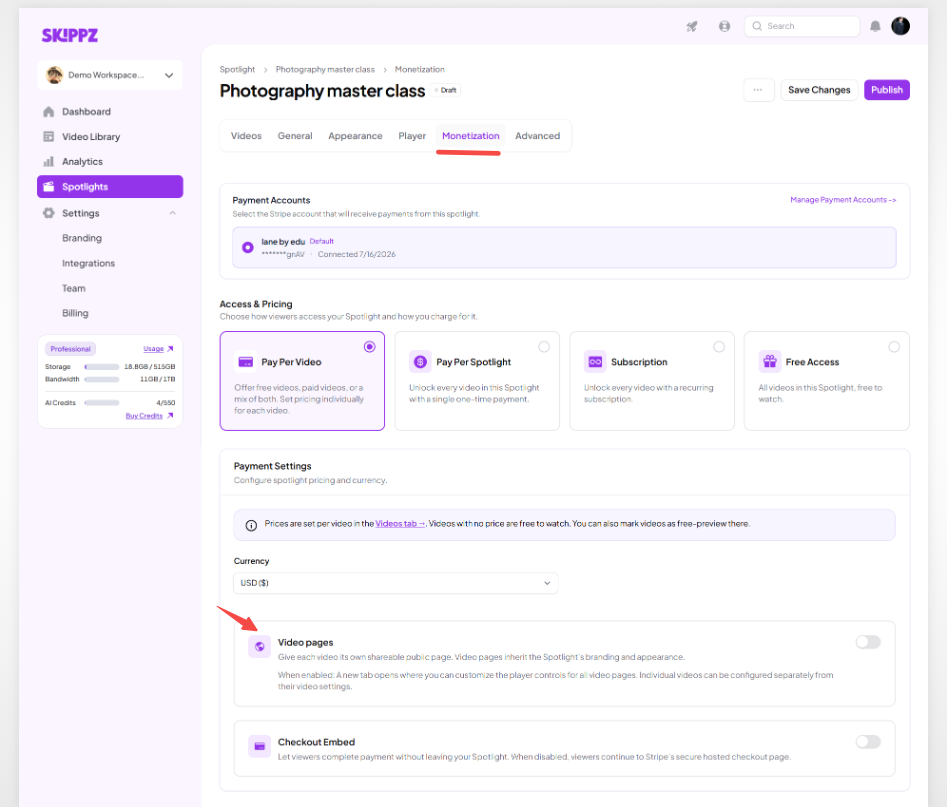
When Pay Per Video is selected, look for the Video Page toggle.
Video Pages are not available for Vertical Spotlight or through the Free, Pay Per Spotlight, and Subscription access options.
In the Pay Per Video section, turn on the Video Page toggle to enable the feature for your Spotlight.
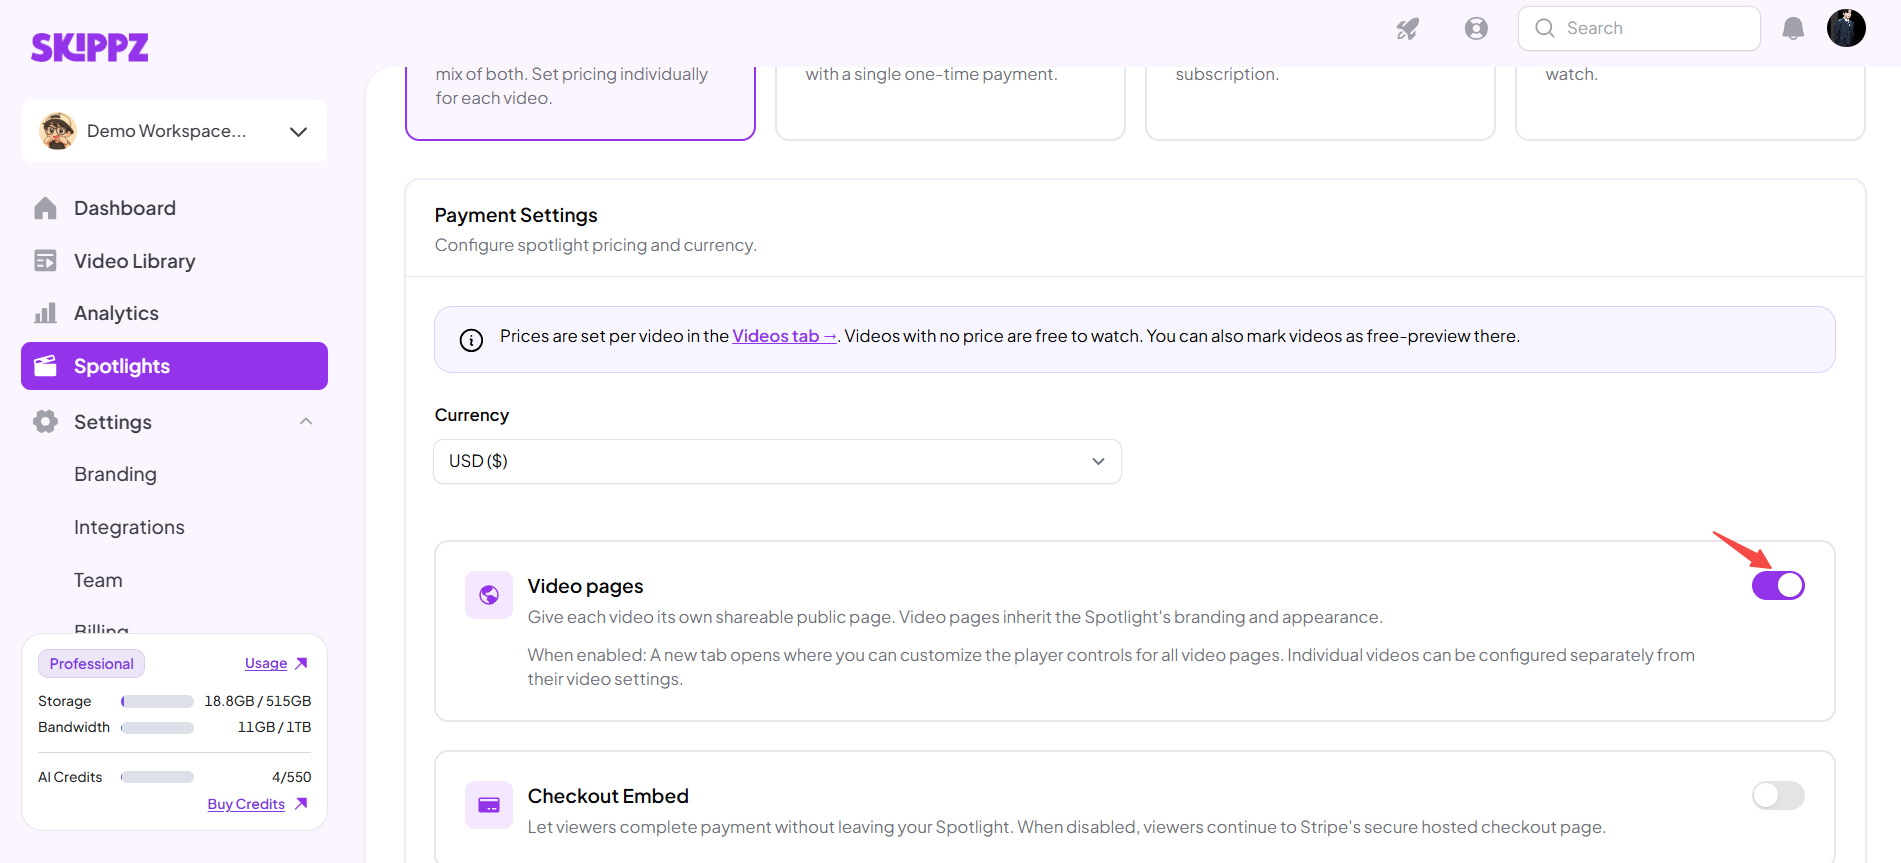
If you're enabling Video Pages from the Spotlight Edit Flow, save your changes after turning on the toggle.
Once the setting is enabled, you can configure Video Pages for individual videos through their configuration options.
Open your Spotlight in the Spotlight Edit Flow and go to the Videos tab.
Find the video you want to configure and click Configure beside it. A configuration pop-up will open for that video.
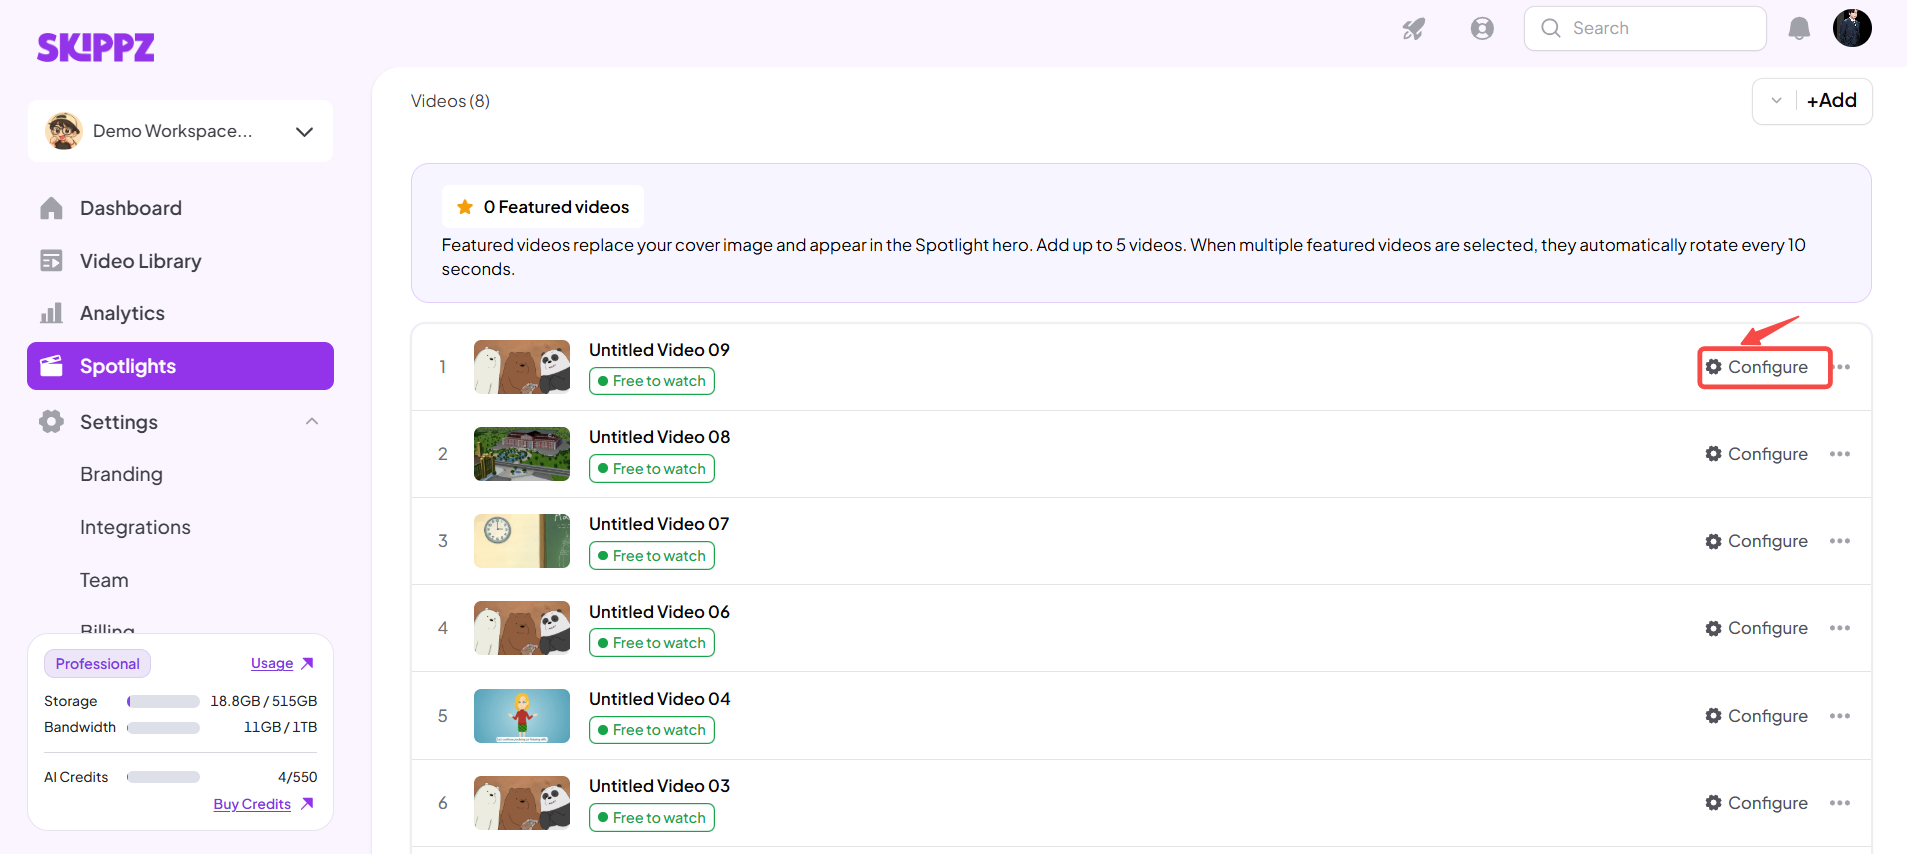
Each video has its own configuration, allowing you to manage its pricing and Video Page settings individually.
Inside the video configuration pop-up, open the Pricing tab.
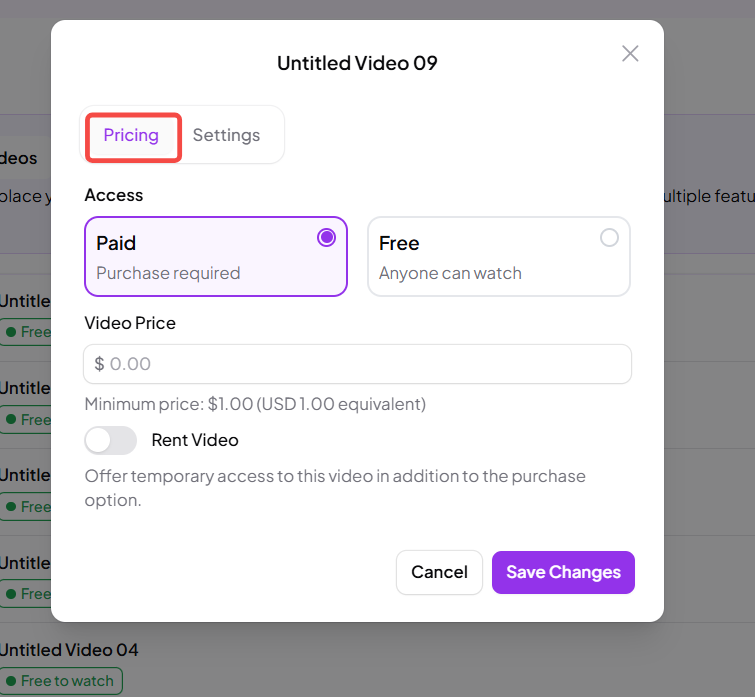
Here, you can choose whether the individual video is free or paid.
Free: Let viewers access the video without paying.
Paid: Set a price for viewers to purchase access to the video.
If you choose Paid, you can also enable the Rent toggle to offer rental access.
When Rent is enabled, you can choose from three rental durations:
24 hours
48 hours
72 hours
You can select all three durations or only the ones you want to offer. Set a price for each selected rental option.
After configuring the video, remember to click Save Changes to save your settings.
In the same video configuration pop-up, select the Video Page tab.
This tab contains the settings for the selected video's dedicated page, including the options to add a trailer and copy its Video Page link.
Repeat this process for any other videos you want to configure.
Add a trailer for the selected video through the Video Page settings.
A trailer can give potential viewers a preview of your content before they decide to purchase or rent the full video. This can be particularly useful when promoting tutorials, educational content, or premium videos.
Choose the appropriate trailer for the video you're configuring and review your selection before saving.
In the Video Page tab, locate the option to copy the dedicated Video Page link.
Copy the link for the video you want to promote. Make sure you select the correct video's link, especially if you're configuring several videos in the same Spotlight.
You can then share the link through your preferred marketing or communication channels, such as social media, email, or your website.
This gives your audience a direct way to reach the specific video you're promoting.
After configuring the video's pricing, rental options, and Video Page settings, click Save Changes in the configuration pop-up.
Saving ensures that your changes are retained.
If you're configuring multiple videos, repeat the process for each one and save its changes.
Open the copied Video Page link to check the result.
Confirm that the link directs you to the intended video's dedicated page. Review the page before sharing it with your audience to ensure you're promoting the correct content.
Once you've checked the page, you can use its link in your promotional activities.
Video Pages are available for Showcase Spotlight only.
You must select Pay Per Video to enable Video Pages.
You can enable the Video Page toggle during Spotlight creation or later from the Monetization section of the Spotlight Edit Flow.
Individual video pricing and rental options are configured in the Pricing tab of the video's Configure pop-up.
Rental options are available when you select Paid and enable the Rent toggle.
You can offer 24-hour, 48-hour, and 72-hour rentals in any combination.
The Video Page tab lets you add a trailer and copy the video's dedicated link.
Always click Save Changes after configuring a video.
Video Pages are not available for Vertical Spotlight, Free, Pay Per Spotlight, or Subscription access.
Understanding Video Pages
How to Use Video Pages to Sell or Rent Individual Videos
Video Pages FAQs