
A webhook URL is an endpoint provided by another application where Skippz can send data.
You usually get this URL from:
Automation tools like Zapier or Make
CRMs and email platforms
Your own backend or server
Any software that supports inbound webhooks
This URL must be:
Live and publicly accessible
Able to accept POST requests
Not protected by authentication that blocks incoming requests
To create a webhook integration:
Go to Settings → Integrations
Find Webhook and click Connect
Enter a Webhook Name for identification purposes
Paste your Webhook URL
Click Test Connection
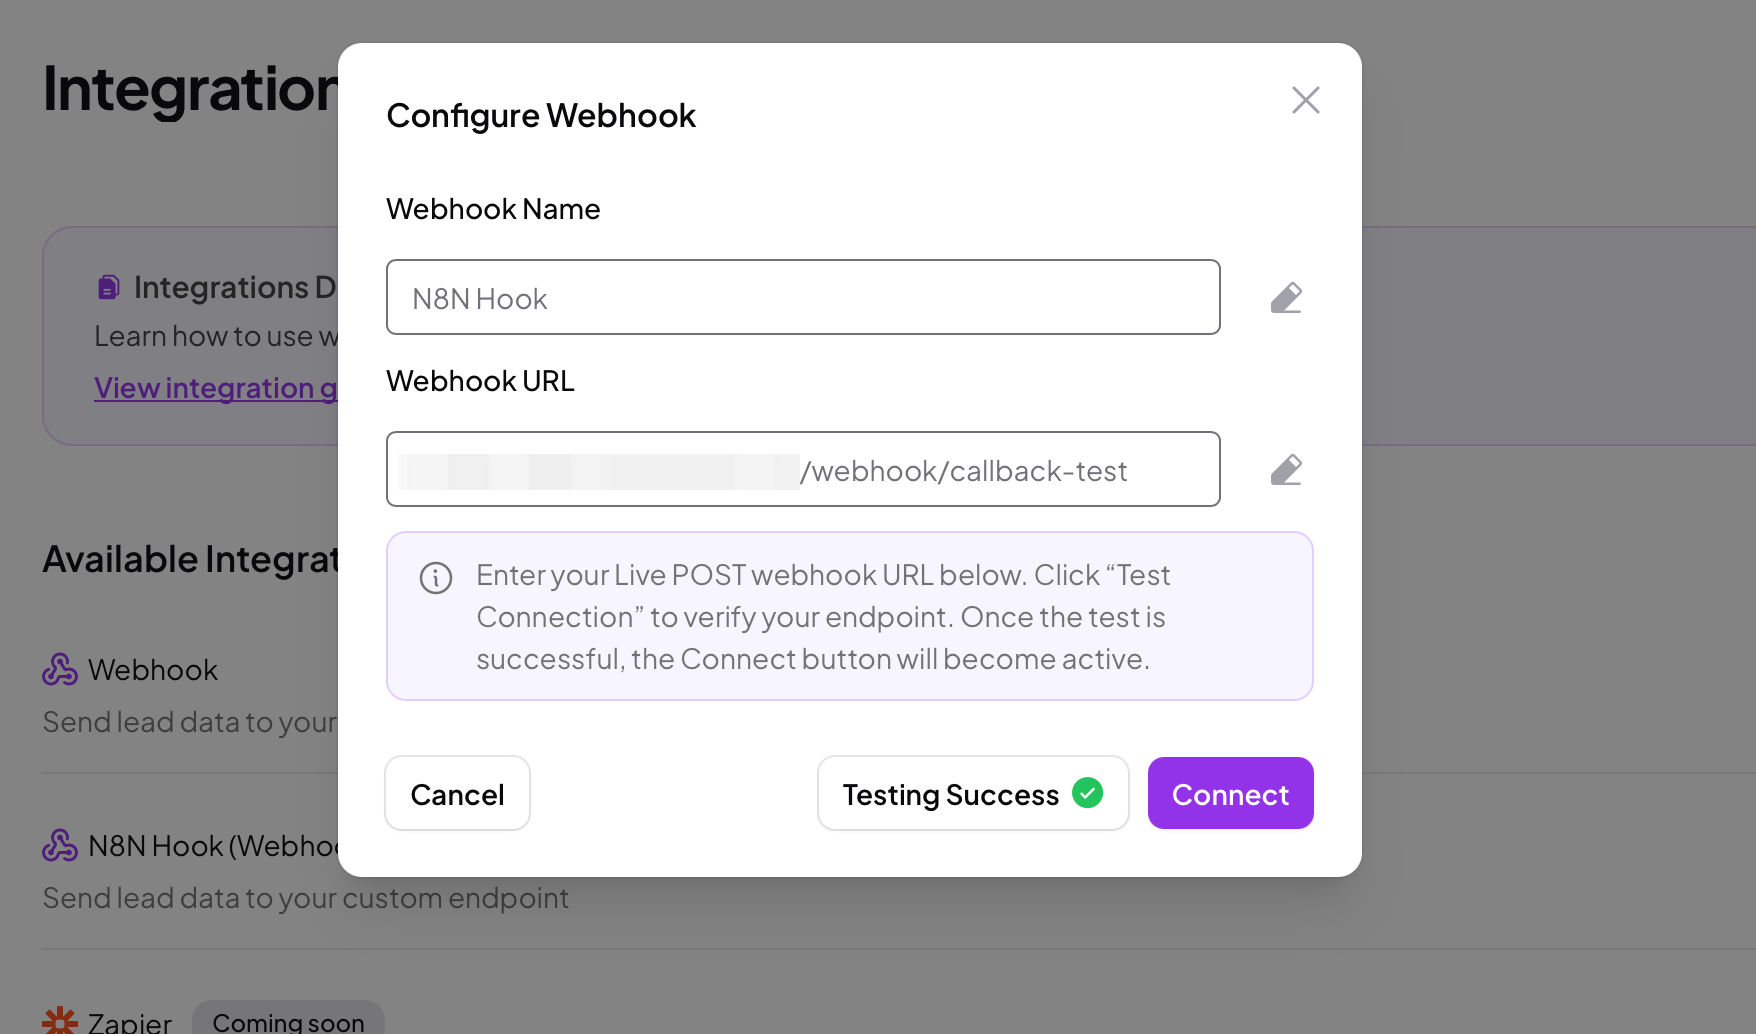
Skippz will send a test request to verify that the webhook endpoint is reachable.
If the test is successful, the Connect button will become active.
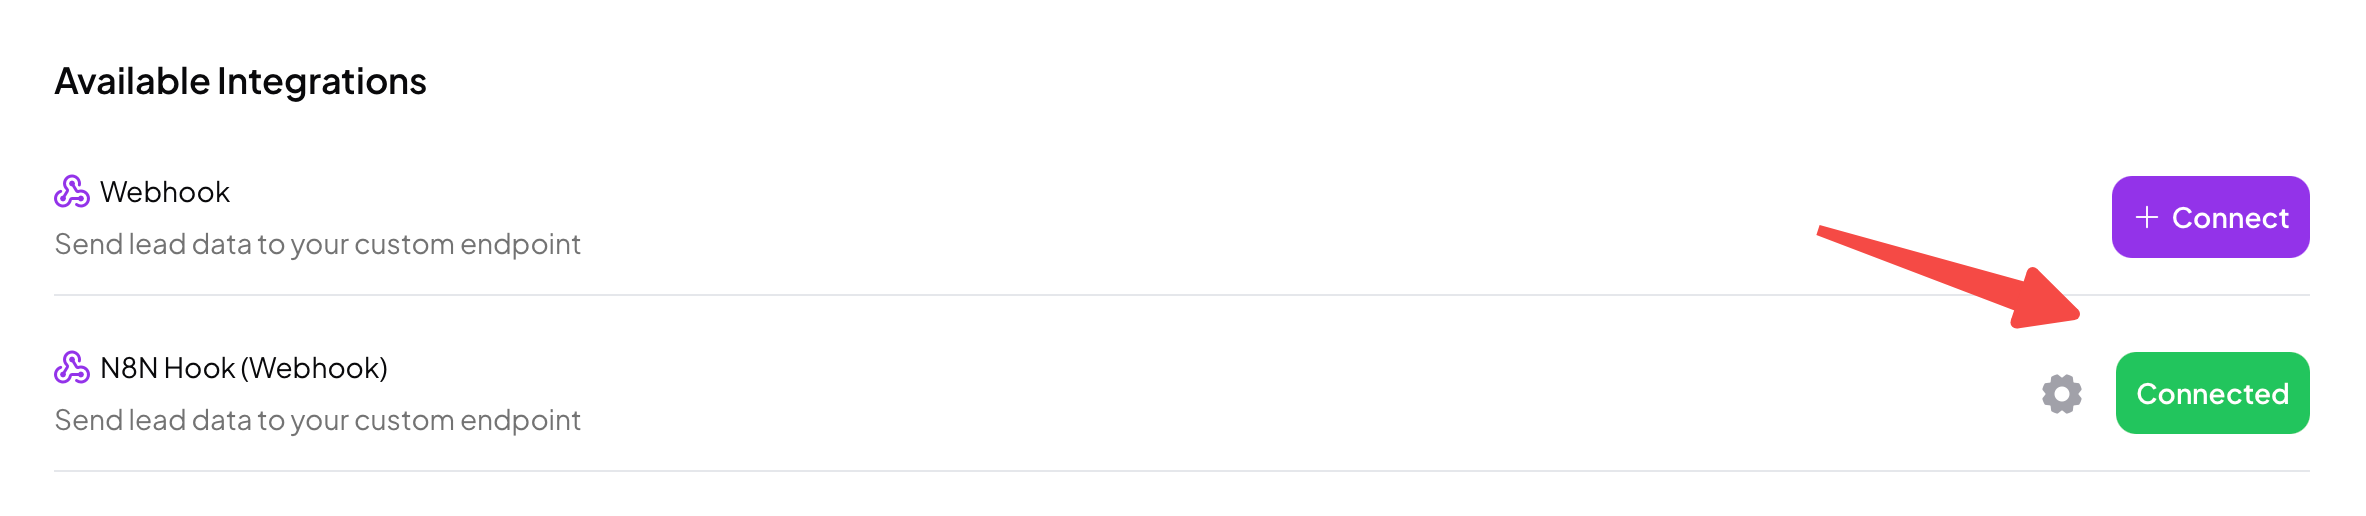
Click Connect to save the webhook.
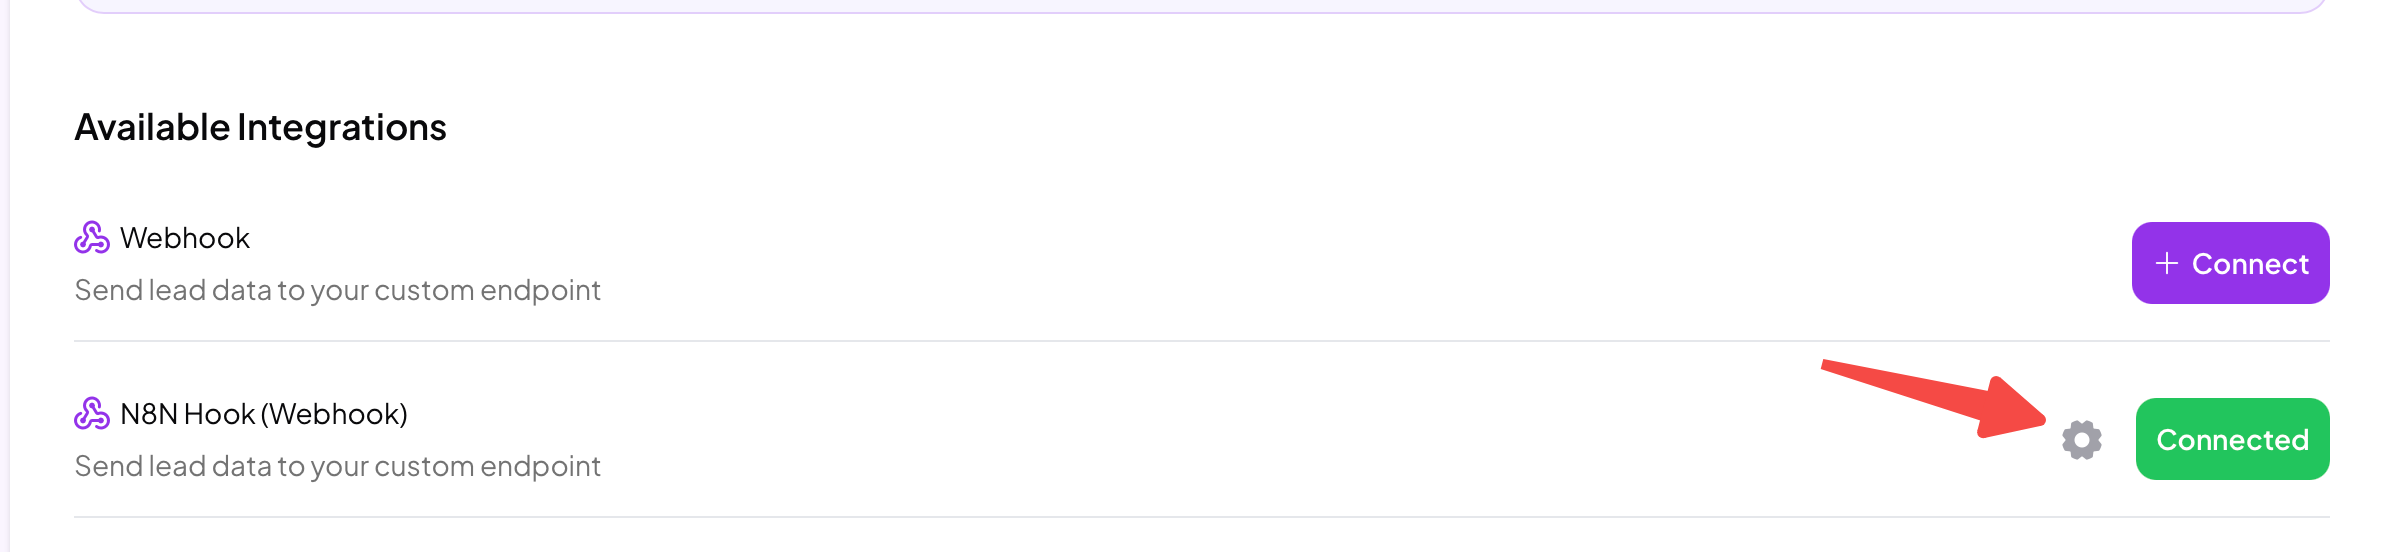
After a webhook is connected, you can manage it using the gear icon next to the integration.
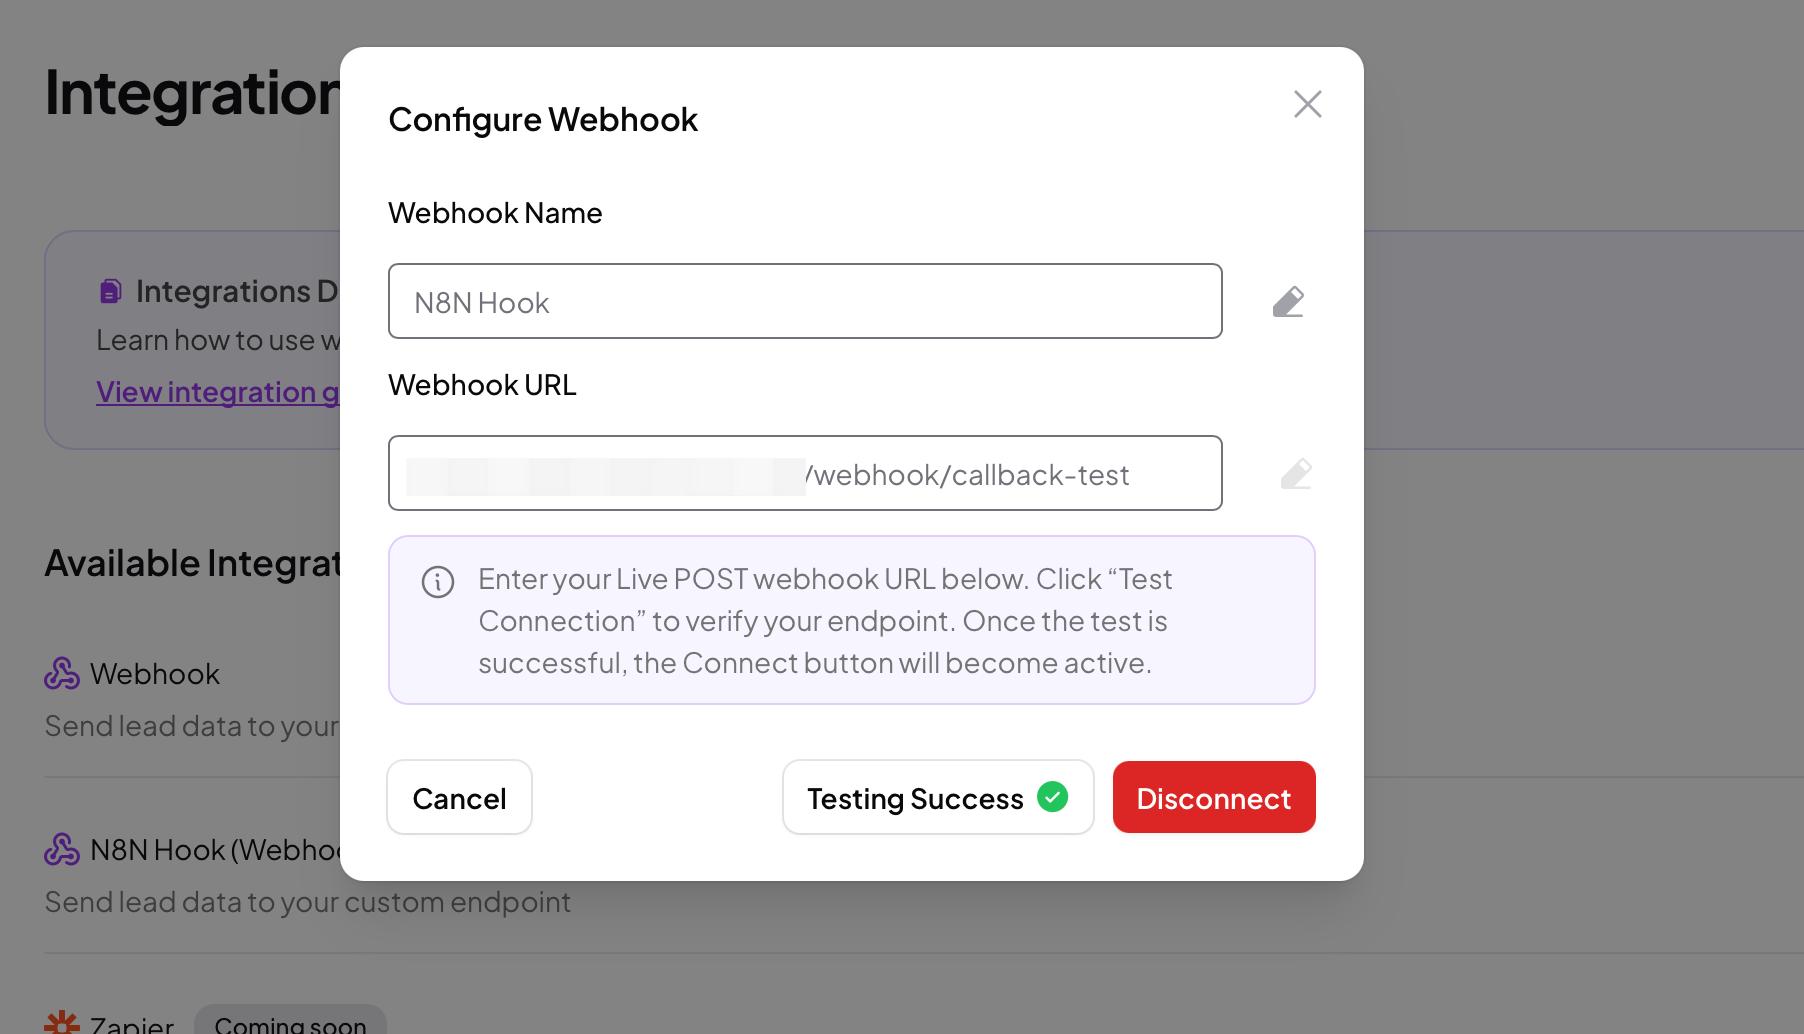
From here, you can:
Rename the webhook
Disconnect the webhook
Disconnecting a webhook does not delete any existing leads. It simply stops future data from being sent.
When a form is submitted, Skippz sends:
All form field values
Video identification data
Submission metadata such as timestamp
The exact structure depends on your form configuration.
If a webhook does not work as expected, check the following:
Some tools require you to publish or enable the webhook before it can receive data.
If the endpoint requires headers, tokens, or authentication, the connection test may fail.
Skippz sends data using POST. Endpoints that only accept GET requests will not work.
If the webhook URL changes, you will need to update it in Skippz.
Creating a webhook does not automatically send data.
To activate it:
Go to the video
Open the Leads tab
Attach the webhook integration to that video
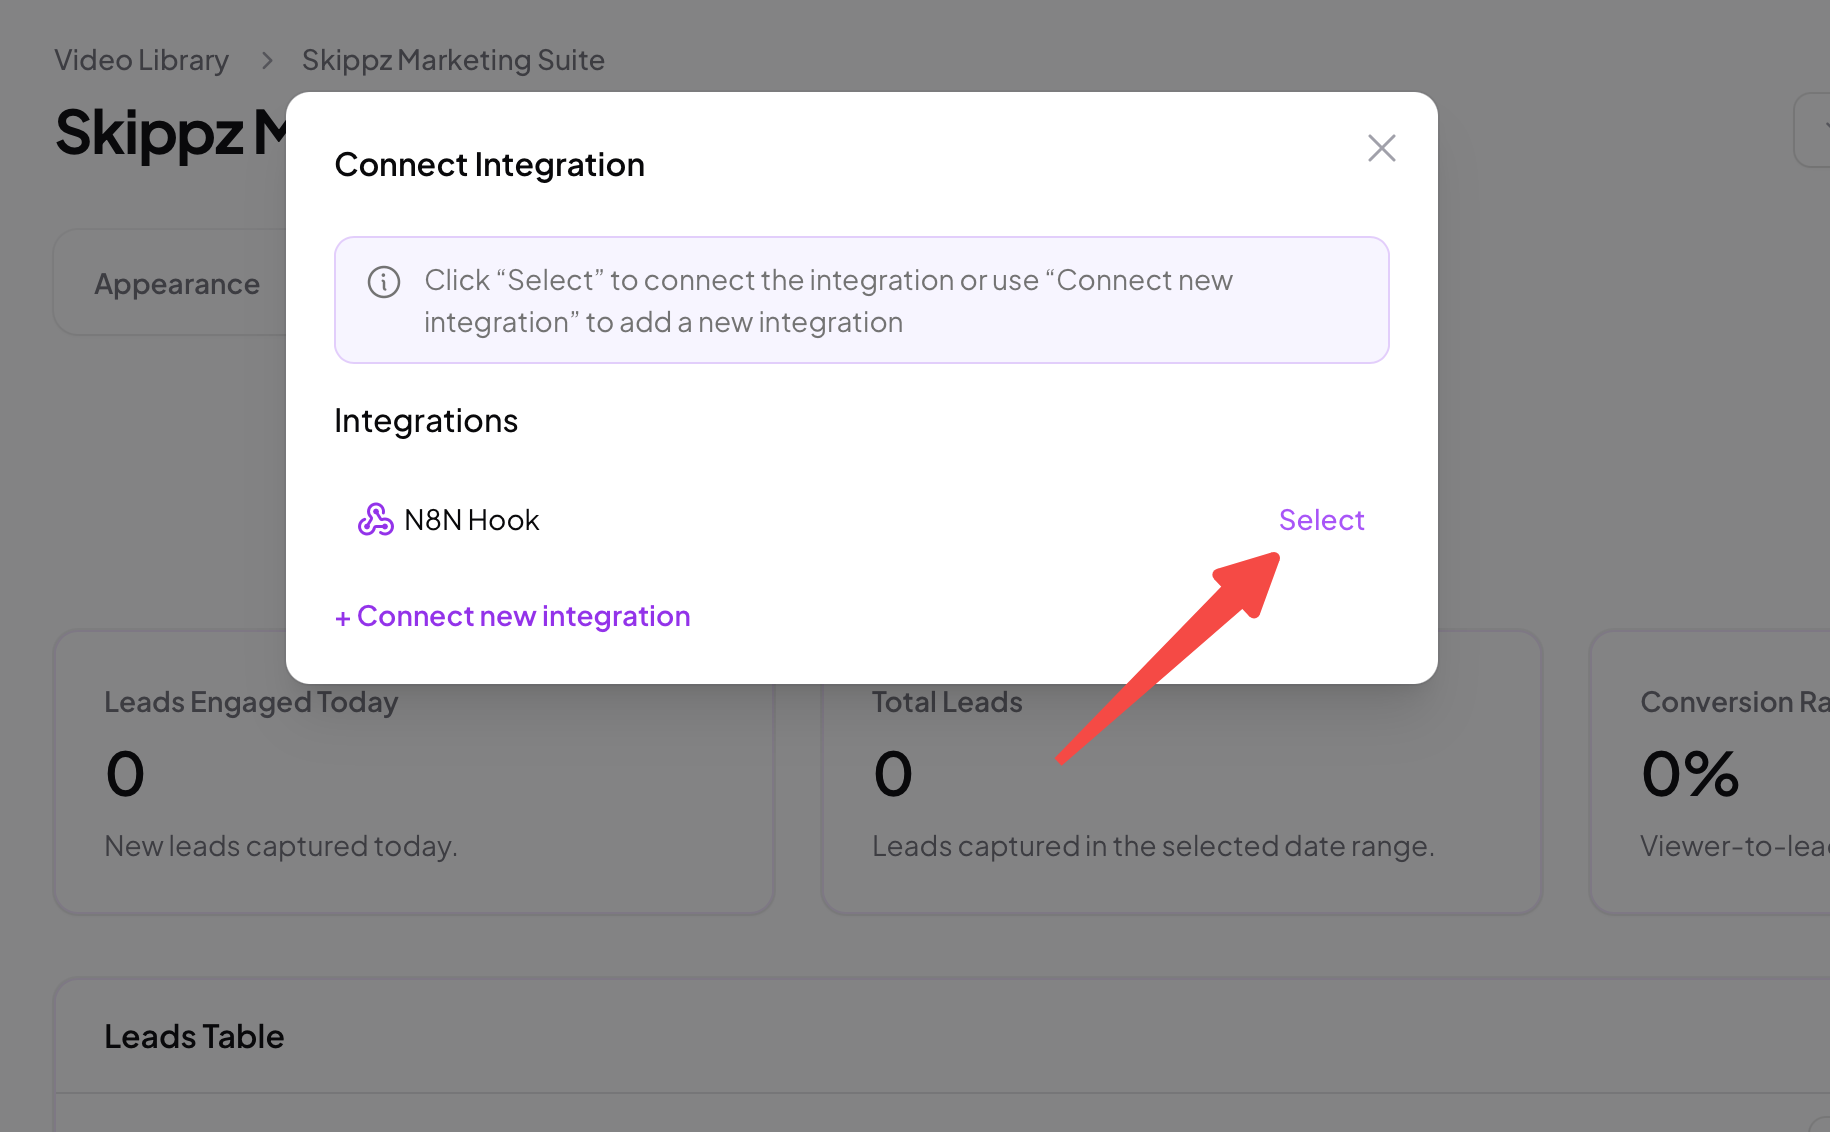
Only then will form submissions from that video be sent to the webhook.
You can create multiple webhooks in Skippz
Webhooks are reusable across videos
Webhooks only send form submission data
Each video can have its own integration setup